Tips for Baking Cakes
Tips for Baking Cakes is a collection of ideas I’ve come up with that may help inexperienced bakers. I thought it would be helpful to share some tips for bakers especially those who are new to the art of cake baking, or those who have had a few bombs. I will probably keep adding to this post as I think of tips that will help.
Follow Me On Instagram!
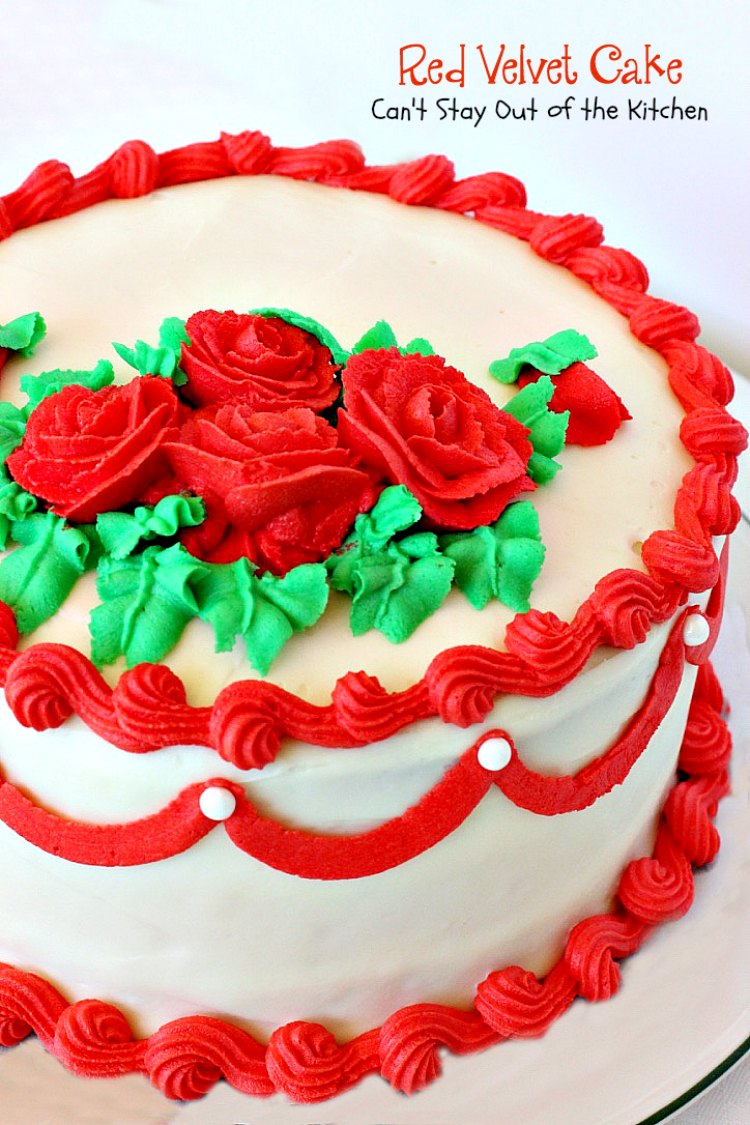
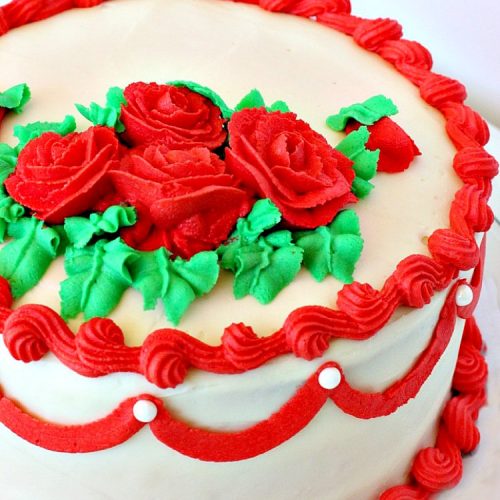
Those of us who enjoy baking want our cakes to turn out like this:
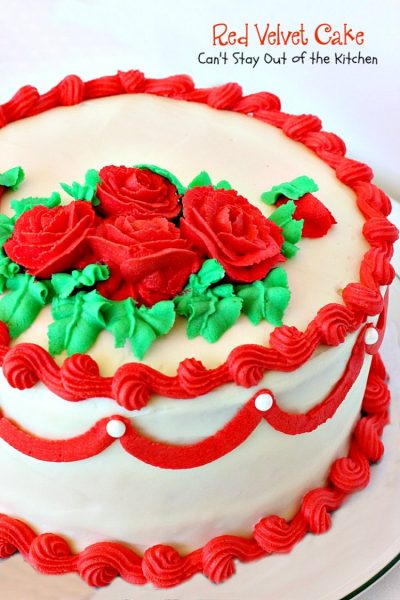
Here’s a picture of my delicious Red Velvet Cake. It is a moist cake and takes 2 batches of the regular cream cheese icing in order to get the rich, decadence this cake requires. Special thanks to Hannah Noice, Ovilla, Texas, for her inspiration and decoration of the cake.
But in order to get cakes that look and taste right there are a few tips that can be followed to help.
CAKE BAKING TIPS:
- Never use BLEACHED flour in a recipe for cakes, cookies or any baked goods. Only use UNBLEACHED flour. Bleached flour causes cakes and cookies to become tough because of the processing.
- To make buttermilk for a recipe add about 1 tablespoon vinegar or lemon juice for every 1/2 cup of milk in a recipe. Wait about 5 minutes and the milk will start curdling and be ready.
- Grease and flour your pans well.
- Avoid non-stick pans with teflon coating because they can scratch and pieces of the teflon can end up in your cake!
- When the cake recipe calls for oil rather than shortening or butter, the cake tends to be more moist.
- Butter can be softened for recipes by setting out on the counter for an hour or two (depending on the temperature of your house). If you microwave, do so at only half power and watch carefully because once butter starts softening it quickly melts. In most cases, if you melt the butter it changes the whole texture of cake and especially cookies or brownies.
Tips for making Carrot Cake (This can be applied to almost every cake)
- This is supposed to be a moist cake. Avoid the temptation to overcook it.
- We use grated or shredded fresh carrots – some recipes call for canned carrots (yikes!)
- One pound of shredded carrots = 3 cups shredded carrots for this recipe.
- Don’t ever overmix your batter. Mix the eggs, butter, sugar and extracts together. Then stir in the remaining ingredients all at once. (I prefer using wooden spoons).
- Overmixing causes toughness. Cakes and coffeecakes must be stirred when the dry ingredients are added or they don’t develop the correct consistency.
- After mixing the eggs, oils, sugars, and extracts with a hand mixer, I then stir in all the ingredients at once – some want you to keep adding things and stirring. The problem with that is the tendency to get too heavy handed with the mixing resulting in a tough, dry cake.
Don’t overmix the batter!
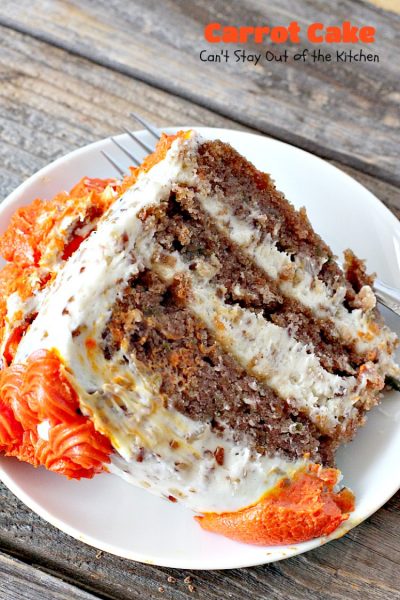
This is what Carrot Cake and most other cakes are supposed to look like when it’s done. It is not supposed to be mixed so strongly that it has a smooth texture.
- When I see pictures of cakes on the Internet, far and away the most significant problem is overstirring and overmixing the batter. I can tell by looking at them if an electric mixer has been used to add the dry ingredients. This may be due to all the new cooking tools and food processors available these days that weren’t available when I started out cooking.
- If you want great tasting cakes, don’t use your electric or hand mixer for adding the dry ingredients.
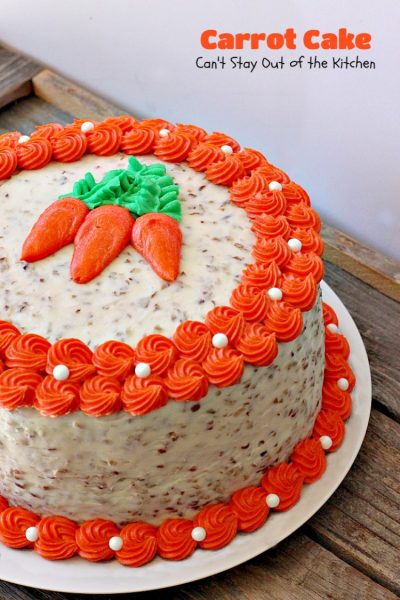
Is this not a spectacular-looking Carrot Cake?
Tips for making Cream Cheese Icing
- Cream cheese icing is supposed to be thick. It’s not supposed to be droopy or weepy-looking.
- If it’s thin or drooping down the sides of the cake too much liquid was added or not enough powdered sugar, or both.
- The best way to soften the cream cheese and butter is to leave it out on your counter while you are making the cake batter. It should be softened and ready to use in an hour or so.
- If you forget or are in a hurry, be careful about microwaving the cream cheese and butter so that they melt. Cream cheese frosting needs to be made with ingredients that are the consistency of softened butter and cream cheese, not melted butter. You won’t get the right texture if you melt the butter.
- Use real ingredients! Skip the margarine and go for real unsalted butter. The difference in texture as well as taste is amazing.
- Add the powdered sugar and vanilla to the frosting and mix with a mixer until the lumps from the sugar are gone. This should be no more than a minute or two.
- If the mixture seems weepy, add more powdered sugar until you get the right texture.
- Don’t follow the recipe so religiously that you put bad cream cheese frosting on your cake! If it needs more powdered sugar to get the right texture then add some.
- My recipe doesn’t call for any additional liquid but some cream cheese frostings do. Don’t be heavy handed when adding them. In this case, less is usually more!
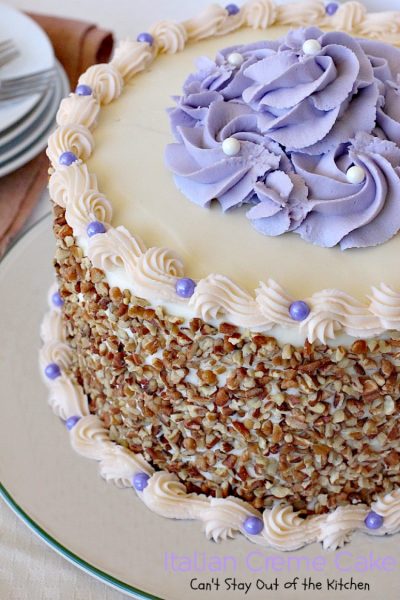
Here’s a picture of Italian Creme Cake. The icing is thick, it’s not droopy, weepy, or a sloppy mess. It is not supposed to look like marshmallow creme when you finish. Use less butter and add more powdered sugar!
- The butter and cream cheese cannot be so soft that they are almost melted. When I say softened cream cheese and butter, I mean they must have some body to them–but they can’t be so hard that they are like chunks when you mix them in the mixer.
- Refrigeration will keep the cream cheese frosting a nice texture, but it shouldn’t be soupy to start with.
- This photo’s recipe called for ingredients in almost the same proportions as mine. Let me repeat: Add more sugar! As much as needed to get a creamy texture like the kind you see at the bakery.
- If your recipe consistently gives you bad results, cut down on the butter.
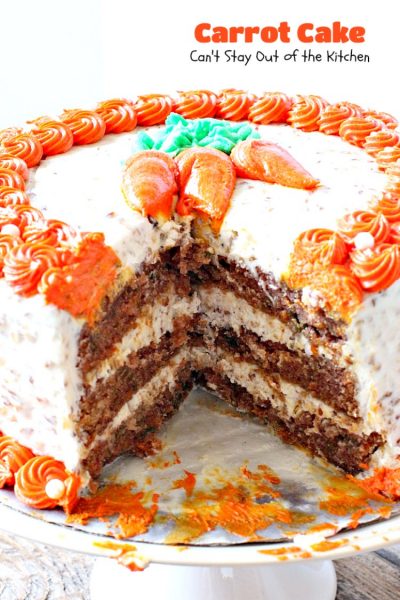
You can see the thick texture of the cream cheese in this picture. The frosting stays in place and doesn’t droop down the sides.
Tips for using bundt pans:
- Make sure you grease and flour your pan really well. I mean really slather on the Crisco shortening.
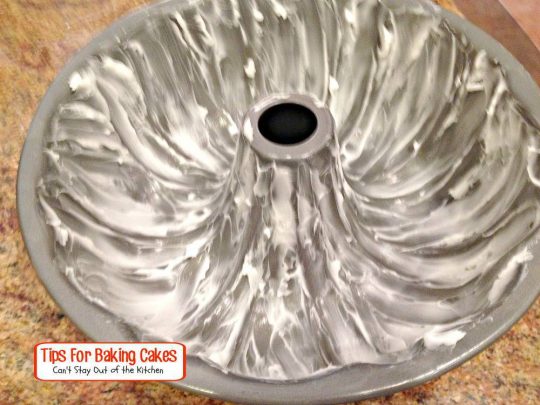
Here’s a well-greased bundt pan as I prepare to bake Blueberry Coffeecake.
- Don’t try to use cooking spray, most of the time it just won’t work and you will have a mess on you hands.
- After greasing the pan, sprinkle flour on the tube center and then on the bottom of the bundt pan. Then rotate the pan several turns until the whole pan is coated well with flour.
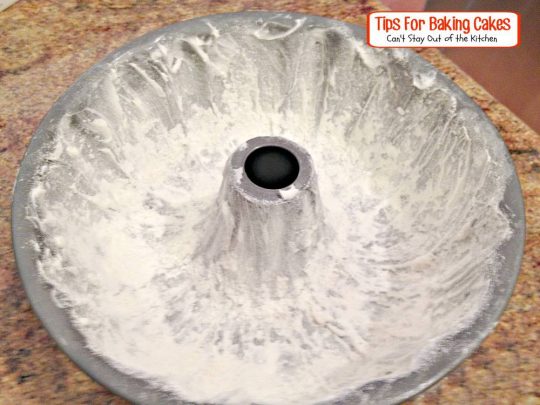
Now I’ve also floured the bundt pan. Note that I flour the cone as well.
- When cooking a bundt cake, NEVER bake strictly by a time measurement!
- Insert a table knife into the middle of the pan all the way to the bottom. If the knife comes out completely clean, the cake is done and not before. If you undercook a bundt cake it will fall out of the pan in clumps! This is what happened to me the first time I baked one. 🙁
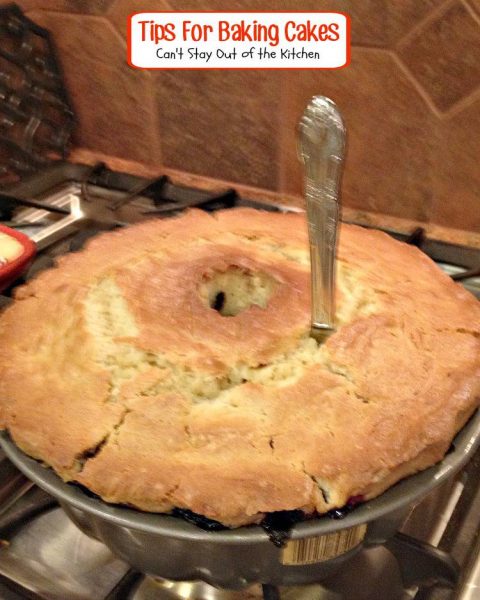
Here I’ve stuck a knife down to the bottom of the Blueberry Coffeecake to see if it was cooked all the way through.
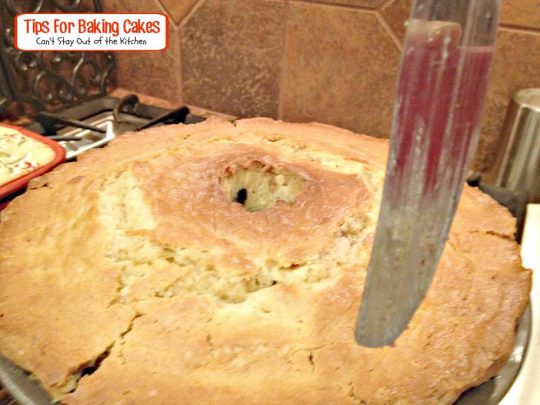
This photo shows the knife still hasn’t come out clean even though the cake had cooked the length of time the recipe suggested.
- Using a flexible or rubber type spatula loosen the outside edges of the cake all around its circumference pushing the flexible spatula underneath the whole to the bottom of the cake (inserting the spatula as far as it will go deep into the edge of the pan).
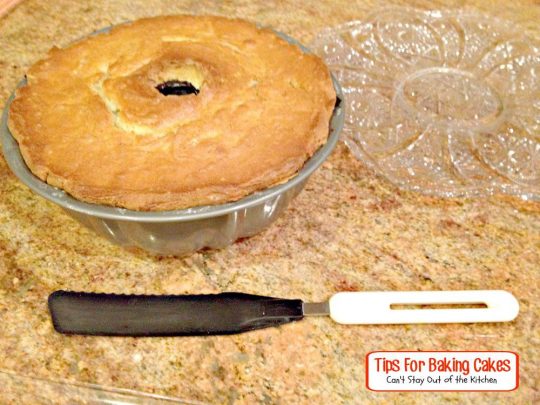
Here is a picture of the rubber spatula I use. You can tell that it’s flexible. It bends so that I can insert it against the pan and it will slide all the way to the tube center. It’s fabulous. I’m not sure where I purchased this, but I’ve had it a really long time. If you can find something like this it is very helpful for bundt cakes.
- Many times cakes will come out easily by using a spatula around the edges and bottom of the pan like this. If not, you may have to use your table knife and insert it around the tube portion of the bundt pan very carefully.
- Place a plate on top of your bundt cake and invert the cake. Tap the bottom and sides carefully.
- If you have greased and floured your pan well, and cooked the cake long enough it will usually come out without any problems. However, if you have a streusel layer or fruit layer in the middle sometimes those can stick and there may be some difficulty. (Try to keep those layers away from the edge).
- I don’t think I’ve ever had a bundt cake cook in less than an hour and most of the time they take 1 hour 15 minutes to 1 hour and a half to fully cook (even though recipes say considerably less). Check your oven and test cake for doneness to avoid disasters.
- Also you need to let a bundt cake cool completely before removing from pan.
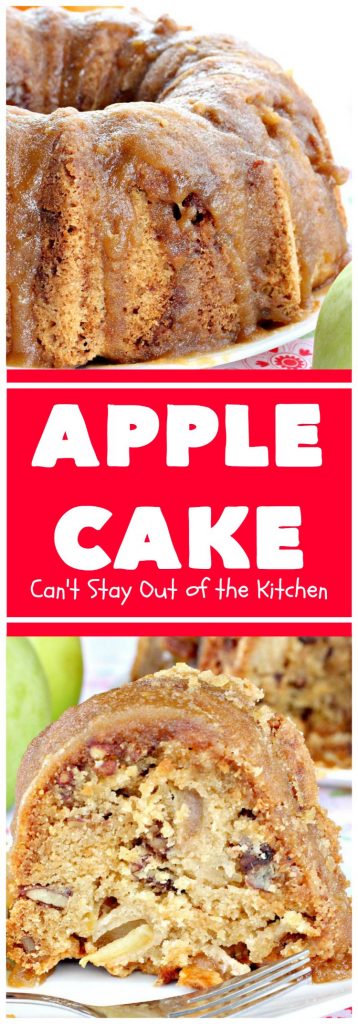
Here’s a look at my Apple Cake. Sometimes these cakes take an hour and a half to fully cook so they don’t fall out of the pan in clumps! Always insert a table knife to the bottom of the pan and see if it comes out clean. If there is still residue on the knife you need to keep cooking it until it comes out clean!
Tips for making a powdered sugar glaze for bundt cakes or oblong cakes:
- Avoid the temptation to add too much milk or water to the powdered sugar at the beginning. Start with half what the recipe calls for and work all that in before adding any more liquid.
- The ratio is about 1 cup of powdered sugar to 1 to 2 tablespoons of milk or water. If you add too much liquid the icing becomes too thin and will absorb into the cake so that you cannot even see it.
- Make a thick icing that will look fabulous in presentation by using the smallest amount of liquid necessary to get a thick icing. It shouldn’t be so thick that it globs on the spoon, but it shouldn’t be dripping like a faucet either.
- Mine is thick and holds its shape. Allow the icing to dry about 15 minutes before covering cake with plastic wrap.
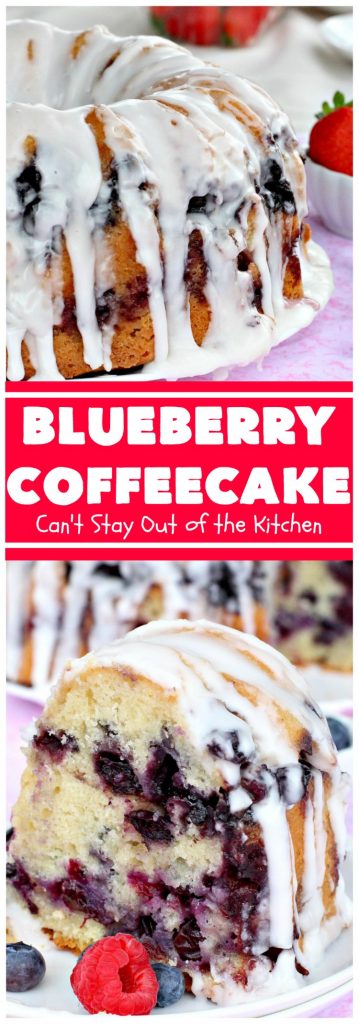
This really thick icing is on my Blueberry Coffeecake.
You may also enjoy these helpful posts!
Tips for Baking Homemade Bread
Tips for Preparing Butternut Squash

10 Comments
Blueberry Coffeecake – Can't Stay Out Of The Kitchen
October 29, 2014 at 8:17 pm
[…] before we get to the recipe, let me offer a few tips for using bundt pans. I also offer a post on Tips for Baking Cakes that you may find […]
Sock-It-To-Me Cake – Can't Stay Out Of The Kitchen
March 14, 2014 at 11:15 am
[…] pan, though, so if you’ve never used a bundt pan, I highly recommend you check out my post on Tips for Baking Cakes. A couple of recommendations: grease and flour your pan very well to prevent sticking, and make […]
Strawberry Coffeecake – Can't Stay Out Of The Kitchen
March 1, 2014 at 1:27 pm
[…] you bake this coffeecake in a bundt pan, I highly recommend you check out my Tips for Baking Cakes post from 2012. But let me say this: strawberries ooze a lot while baking so you have to cook this […]
Carrot Cake – Can't Stay Out Of The Kitchen
June 3, 2013 at 2:36 pm
[…] Tips for Baking Cakes […]
Italian Cream Cake | Can't Stay Out of the Kitchen
September 11, 2012 at 12:29 am
[…] Tips for Baking Cakes […]
Red Velvet Cake | Can't Stay Out of the Kitchen
September 10, 2012 at 9:55 pm
[…] Tips for Baking Cakes […]
Cathy
August 6, 2012 at 7:32 pm
Thank you for the tip on the unbleached flour. I don’t think I’ve heard this before.
Teresa
August 6, 2012 at 8:34 pm
I read it years ago (probably about 25 years ago) for any kind of baked goods–especially cookies. The bleaching process for flour uses a lot of chemicals and heat processes. Very unhealthy.
Candice
July 29, 2012 at 3:05 am
You should really think about giving your Kitchen Aid stand mixer a whirl when it comes to cakes and cookies! There is a “stir” setting on there which mixes very slowly if you are concerned about overmixing and I have made countless cakes and batches of cookies and never had a single one come out tough. It can literally cut your time in half, especially when you’re doing large batches like you do at Christmas time. They truly come out just as good if not better than hand mixing…I bet if you try it you will wonder what you ever did without it! 🙂
Teresa
August 1, 2012 at 6:16 pm
We’ll probably do so with all our Christmas cookie baking this winter. It’s the cleanup I’m not excited about! 🙁
BTW, this is totally off the subject but you guys need to go to San Diego on vacation some time. Wow! What a wonderful city and the highs in the summer are only about 75! We loved it.