
Tips for Deboning Chicken
Tips for Deboning Chicken provides step-by-step pictures and directions for deboning a chicken. If you aren’t in a time crunch, it’s a great way to provide healthy meals for your family and a greatly reduced cost. Scattered throughout the post are pictures of recipes I’ve actually made with the deboned chicken or chicken broth.
Follow Me On Instagram!
I thought it might be helpful to share some tips on deboning a whole chicken for those who have never done it before. Mom used to do it all the time. Finally, after I had been married for some years and had kids I asked her to show me how she did it. I watched her debone the whole chicken which was an extremely helpful exercise. It’s not near as difficult as you might think.
I use cooked chicken this way in so many recipes. My Homemade Chicken and Dumplings, Chicken and Biscuit Casserole and my Slow Cooker Gluten Free Chicken Noodle Soup just for starters. I like to cook off whole chickens because then I also have my own homemade chicken stock that I can use in recipes as well. Rather than using a rotisserie chicken, where I have the meat but no broth. I prefer using a whole chicken with the skin on and the bones, because it makes a much richer and healthier broth than without that. The dark meat, especially produces a deep, rich broth.
If you want to make a recipe that calls for bite-sized chicken pieces than learn how to debone your own chicken. It’s a lot more economical and not as hard as you might think. I do recommend deboning the chicken while it’s hot/warm rather than refrigerated. A refrigerated chicken is much harder to debone and see the different ligaments, tendons, gristle and fat that need to be removed when you debone the chicken.
When I initially posted this recipe in September 2012, it was still the early days of my food blog. I used an iPhone 3 that caused the pictures to be unclear, dark and sometimes grainy. I’ve gone back and remade all those first-year pictures (over 600 recipes) that I took with my old camera so I could have better looking and more attractive pictures. These new pictures better resemble the finished product.
I remade this recipe in both November 2017 and January 2018. When I went to repost this, I discovered that some pictures must have copied over my preparation pictures so I had to make the recipe again and take pictures step-by-step a second time. Regardless, I think you will find these a little easier to follow than the original pictures. the recipes I share using deboned chicken or chicken broth look absolutely delectable. Tips for Deboning Chicken is a helpful way to help even the novice cook learn how to prepare satisfying and delicious meals.Yum.

Tips for Deboning Chicken starts with a raw chicken that’s cooked up in the crockpot. Then it’s deboned and added to your favorite recipes!
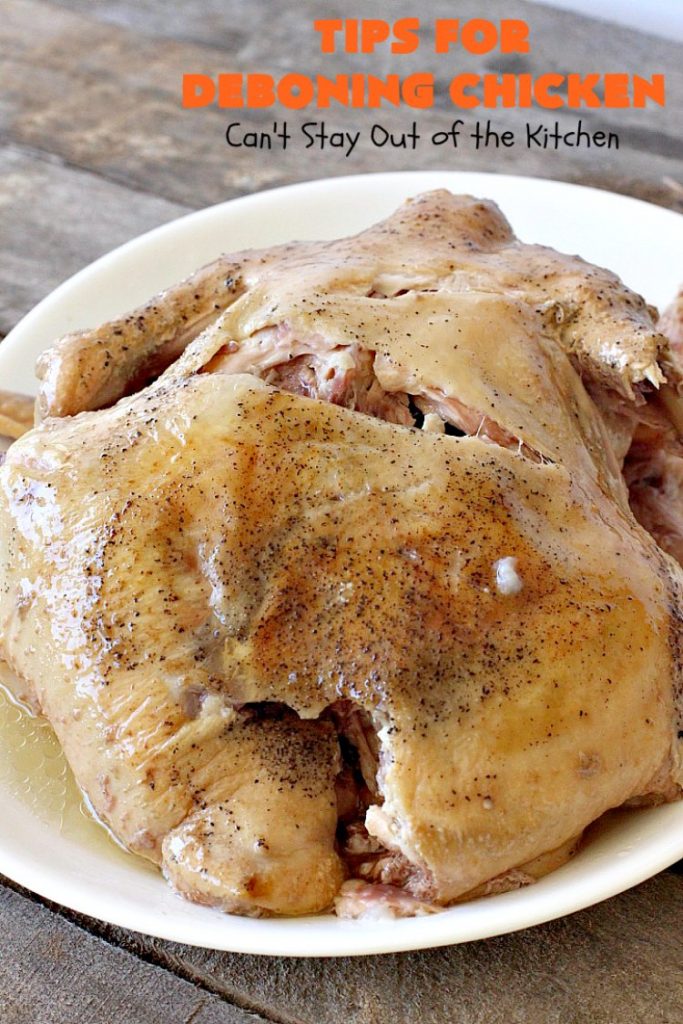
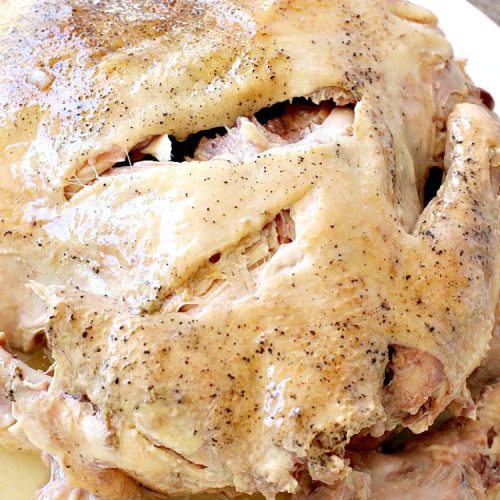
Here’s the chicken after it’s cooked in the crockpot and before deboning. If you cook it long enough, the chicken basically falls off the bone!
Cheesy Chicken Soup is a delicious option for using deboned chicken.

Chicken Tamale Pie is another great way to use deboned chicken.

I used some of the chicken broth for this Ham and Sweet Potato Soup.
TIPS FOR DEBONING CHICKEN
1) After boiling chicken on the stove top or cooking chicken in the crockpot, allow the chicken to cool about an hour before deboning as it is extremely hot and difficult to work with without burning your hands.
2) Allow enough time in your schedule to consider this wait time plus the 15-20 minutes or so it actually takes to debone the chicken before being ready to make your recipes.
3) It is much easier to debone a hot chicken than one that has been refrigerated. The skin doesn’t come off the chicken easily once it has been refrigerated. It is also more difficult to pick out the gristle, tendons and fat if the chicken has been refrigerated. If you are deboning part of a rotisserie chicken it’s easier to do it before storing in the refrigerator.
4) Have your bowl ready to place the meat in and a trash bag to place all the scrap and bones. Plastic grocery bags from Wal-Mart are great for this. Once finished, tie up your scrap bag and put it in your trash.
5) I don’t like to leave chicken scrap trash or juice from raw meats in my kitchen trash because I’m finicky about odors. So I put it in our large garage trash can until it can go outside for trash pick up. If you put this outside overnight animals may get into it, so it’s better to put it out the day of trash delivery.
6) Don’t put raw meat juice down your disposal unless you want a really smelly disposal in a few days. The peels of oranges, lemons and grapefruit can be used in your disposal to freshen it up once this has been done.
7) 1 whole chicken, deboned, yields approximately 4 cups of usable meat.
8) You can keep fresh broth in the refrigerator for a week or freeze for later use.

Tips for Deboning Chicken provides great instruction for making your favorite soups or chili. I used deboned chicken and chicken broth in White Chicken Chili.
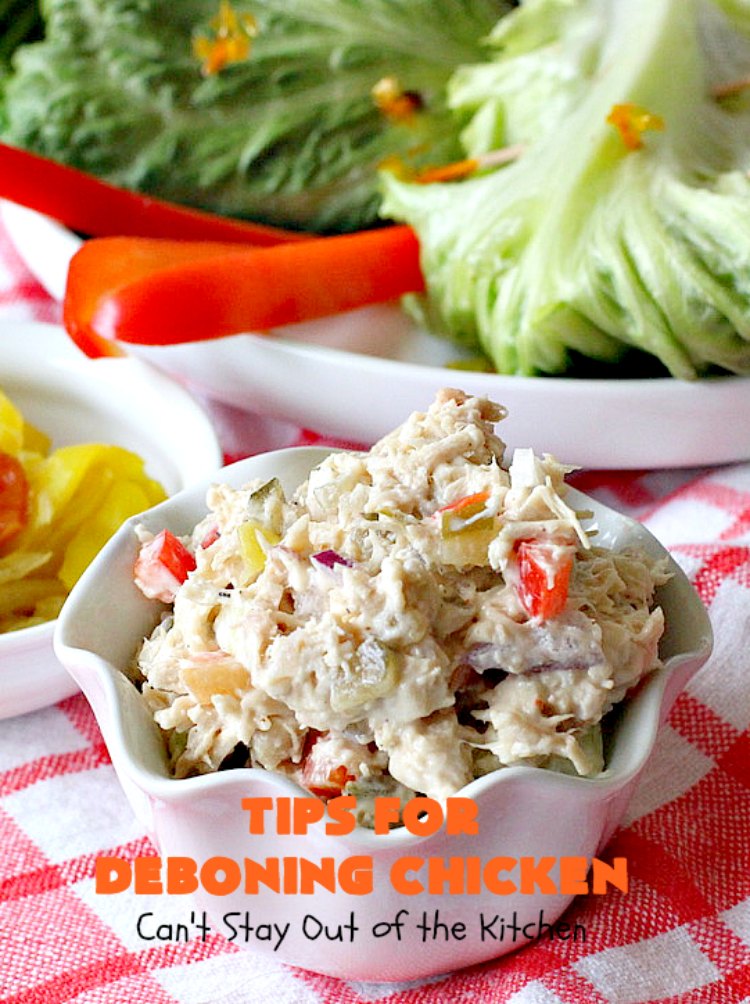
I made up Chicken Salad for Chicken Salad Lettuce Wraps.

Chicken broth and diced chicken were used in this delicious gluten free Easy Chicken and Dumplings.
Here’s what I did.
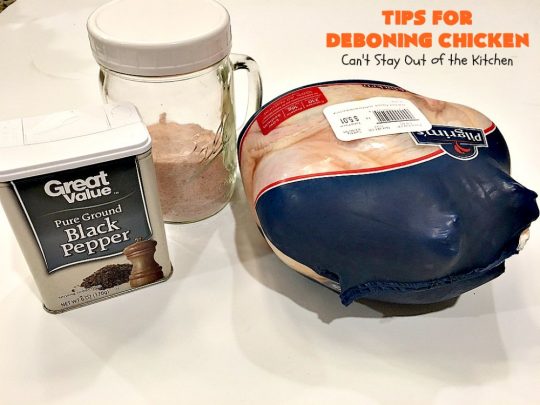
I used these ingredients: a whole roasting chicken, pink Himalayan sea salt (or regular salt) and ground black pepper, along with water.

Place chicken in a crockpot.
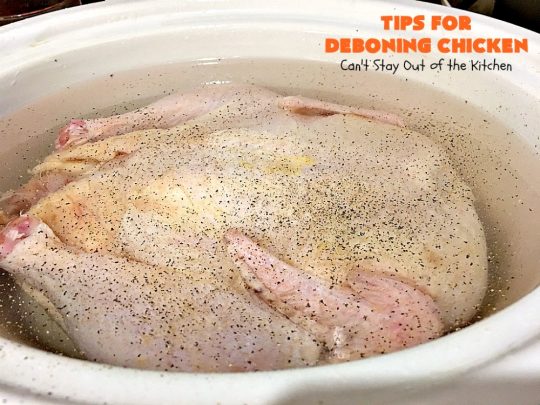
Fill with water and sprinkle very generously with sea salt and pepper. Cover with lid and cook on low overnight or about 6 hours on high.
You can add a little diced celery, onion and carrot (about 1/4 cup each) and other seasonings if you prefer, but I usually make a plain broth.
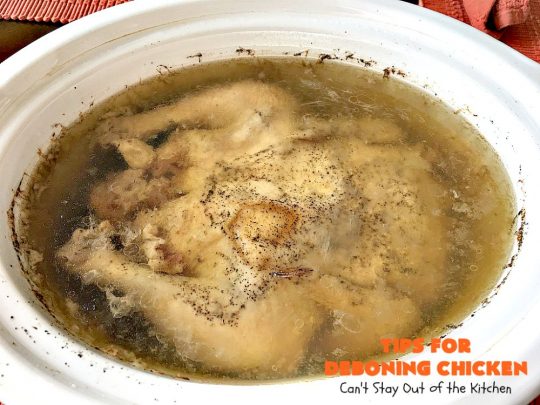
This is what the chicken looked like after cooking 6 hours on high in the crockpot. It gets to a rapid boil so make sure you don’t overfill your crockpot and you find chicken broth all over your counter!
The salted and peppered water has become a rich, healthy, and homemade broth great for use in soups, many chicken casserole recipes, cooking noodles, or anything else you use chicken bouillon or chicken broth for.
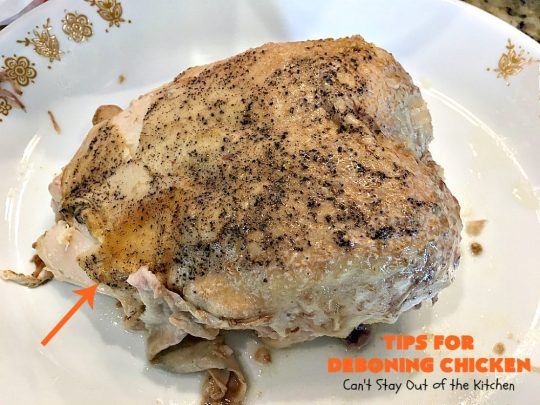
Remove the chicken from the crockpot with large spatulas or slotted spoons and place on a serving platter. The chicken will drain some so it’s helpful to have something that catches the broth.
The first thing you’re going to do is remove the skin. Just pull it back and it will come off in mostly one piece. Have a bowl ready on the left for scraps and a bowl on the right for the meat.
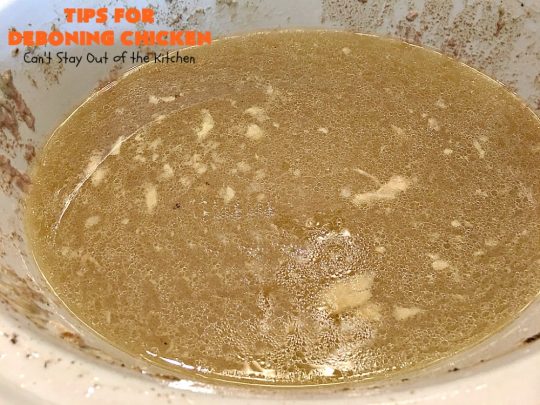
Skim through the broth with a slotted spoon to get out all extra bones, skin, fat, or meat that has fallen into the broth. Refrigerate or freeze the broth for another use.
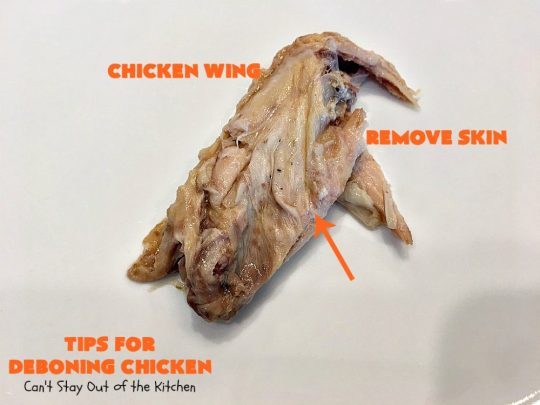
I started with the chicken wings.
Remove the skin from the chicken. This is so much easier to do when the chicken is still warm. Once it’s been refrigerated the skin adheres to the meat and you practically have to scrape it off. Save time and arrange to debone your chicken while still warm.
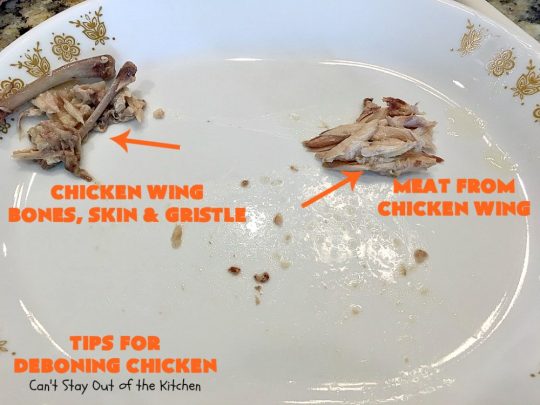
Remove bones, cartilage, tendons, gristle, fat and scrap. Separate the meat and place it on the right. Then move it into the bowl with the good meat and the scrap pile into a trash bag.
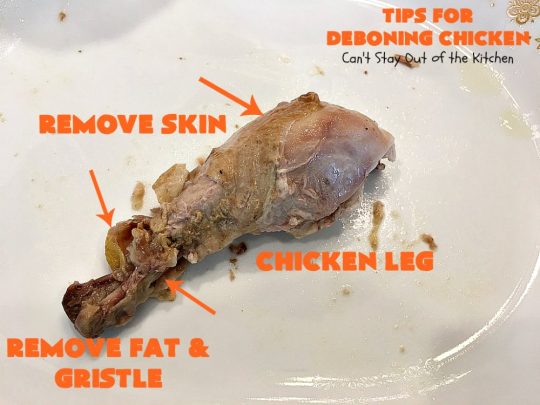
The next thing I work on is the legs or drumsticks.
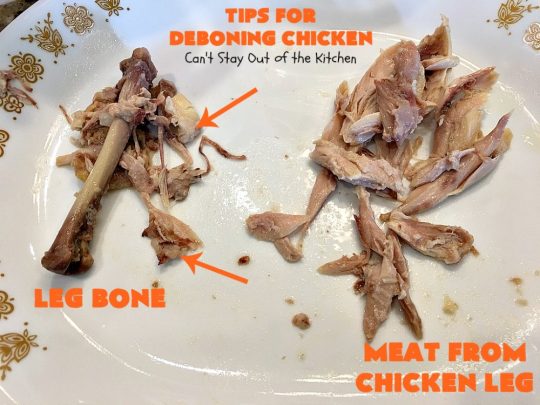
When you’re going through the meat from the drumsticks you have to separate out all the gristle, tendons and fat. There is also a very thin bone that must be removed. Place the meat on the right and move to your meat bowl. Remove the scrap to the trash bag.
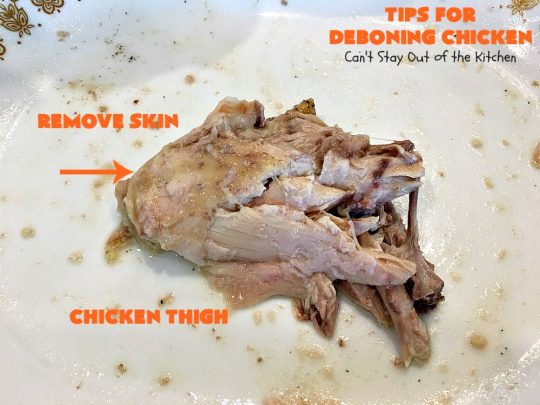
The next part of the chicken I work on is the thighs. Remove skin.
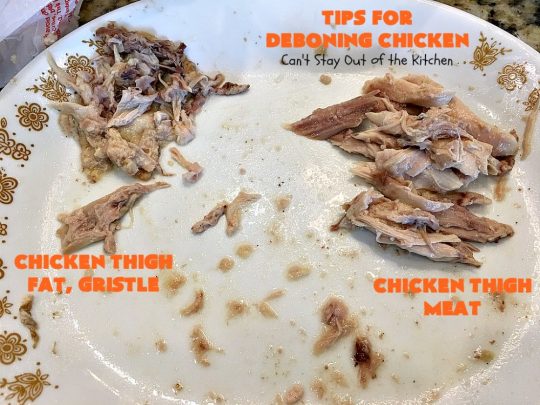
You can see skin, bones, gristle and some fat on the left. The good meat is on the right. Again remove the good meat to the meat bowl and the fat to the scrap pile.
Your hands will have to move through all the pieces of meat and scrap. As you’re deboning you’ll be able to tell immediately what is edible and what must be removed. Gristle, fat, bones, tendons all need to go in the scrap pile.
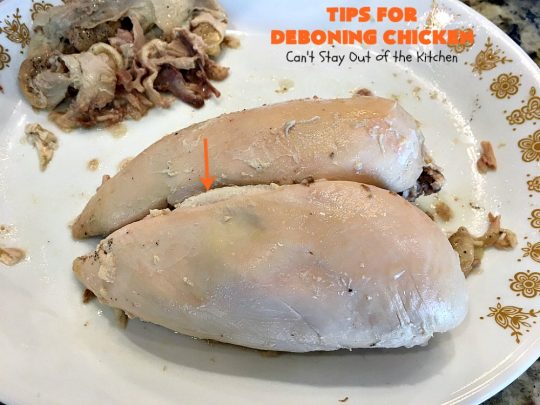
Here are the chicken breasts. After removing the skin (in top left corner), remove the piece of gristle that’s located between the two chicken breasts. (see arrow).
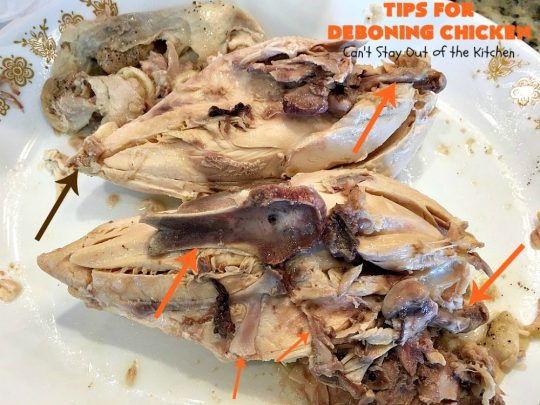
Turn breasts over and remove bones. You will see them where all the arrows are.
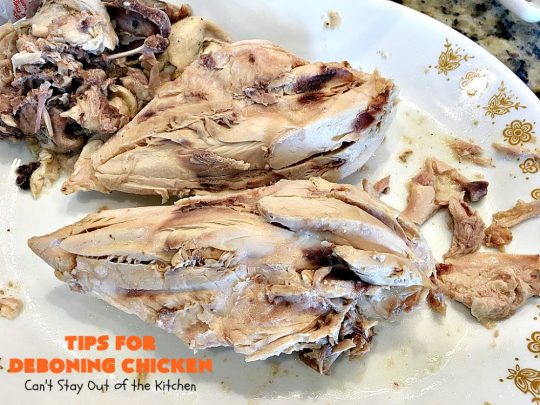
This shows the chicken breasts with all the bones removed from the bottom.
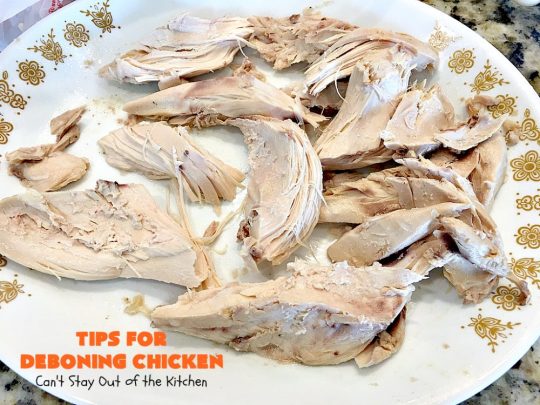
The chicken breast meat is broken up into larger pieces.
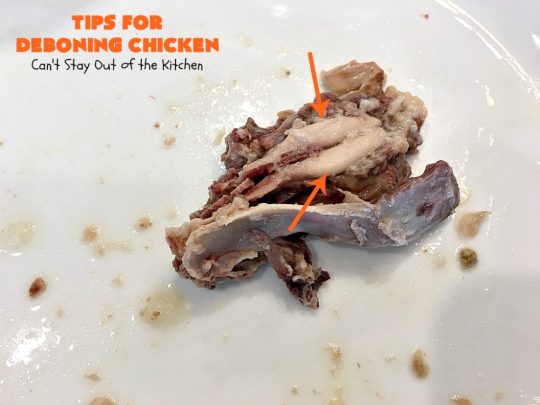
You will find these two pieces of meat on the back bone.
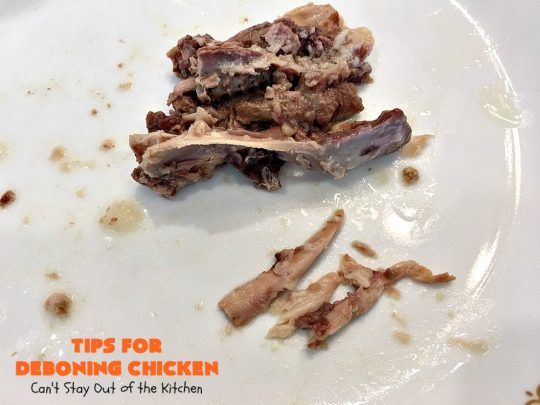
The meat has been removed and placed on the bottom right. The scrap is on the top. Remove scrap to scrap bowl and meat to meat bowl.
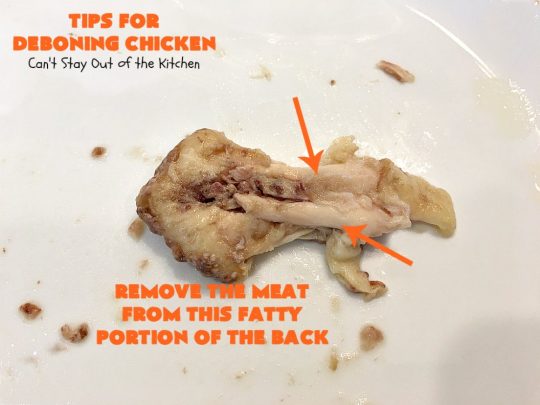
These two pieces of meat are found on the bag near the tail bone (I believe).
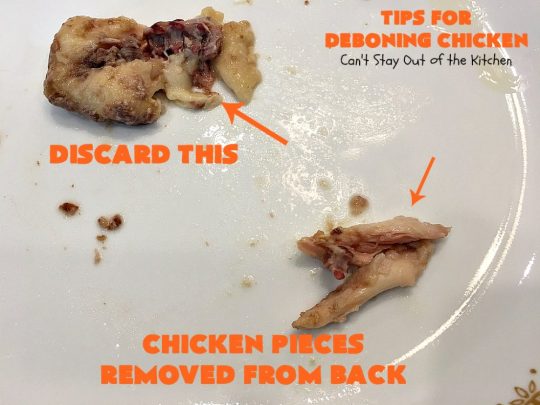
Discard the skeleton part from where you took out the meat and place the meat in the meat bowl.
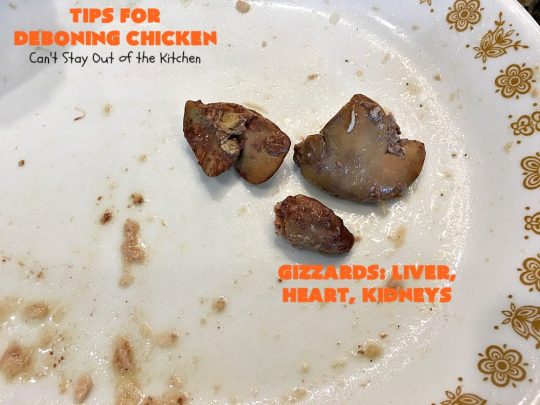
You will find the gizzards in the bag region. I usually discard these, but some people like to chop them up for gravies and other delicacies.

Here’s my pile of chicken meat.
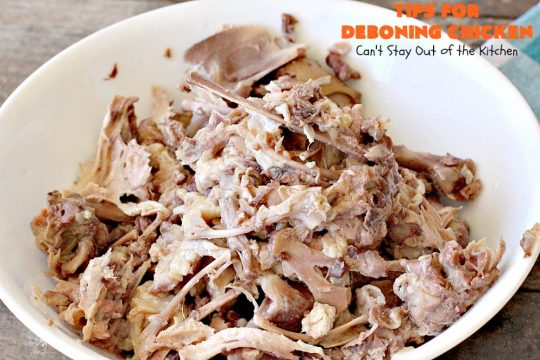
Here’s the scrap pile.
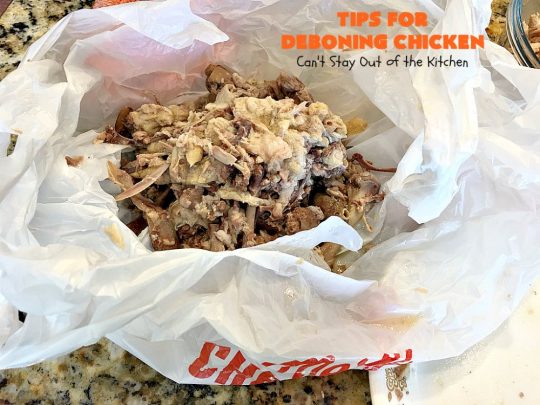
I usually discard the scrap pile in plastic bags. I tie them off and place in the garage so it doesn’t stink of my pantry or cause my dogs to start salivating over it. 🙁
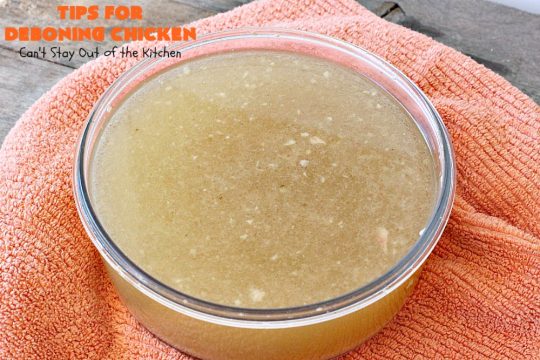
I poured the chicken broth off into a bowl and used it for multiple recipes.
Here’s what can be made with the chicken meat.
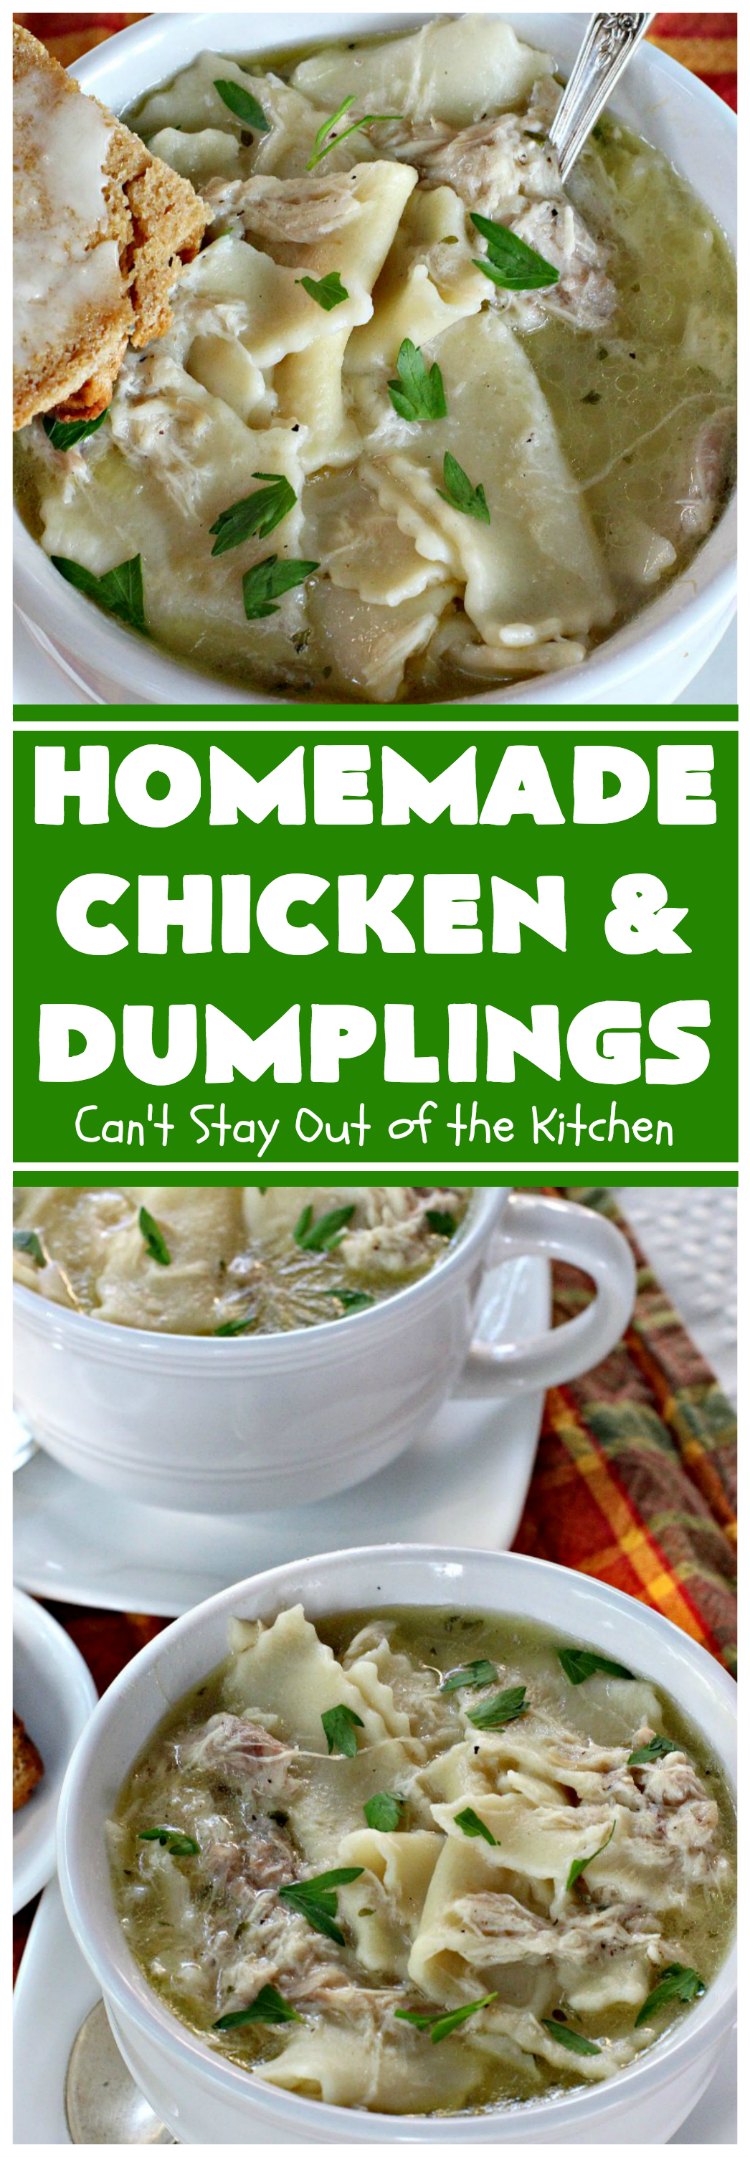
Tips for Deboning Chicken is an excellent way to make your favorite recipes. Especially my Homemade Chicken and Dumplings. Yum, yum!

Slow Cooker Gluten Free Chicken Noodle Soup is a healthy and delicious way to use up the chicken and broth.
You may also enjoy these helpful posts!
Tips For Preparing Butternut Squash
Tips For Preparing Holiday Turkey
Cleaning and Seasoning Cast Iron Skillets


23 Comments
Best Boning Knives Review 2020 (TOP BRANDS & MODELS)
December 18, 2020 at 10:26 am
[…] Tips for Deboning Chicken […]
Wendi
June 23, 2020 at 9:31 am
Hello, Teresa. I love your blog. It’s so “real” in that when you share a recipe, you oftentimes share what did not work well or produce the best result. That is true culinary honesty right there! But your entry on de-boning a chicken hurt my heart. You are throwing away a goldmine, and I have to share some tips with you.
Tip 1: Never, ever throw the bones away (skin, yes; bones, no)! This is the stuff that stock is made of! If you have a pressure cooker, throw those bones into the pot, add some water, salt and black pepper corns; 30 minutes on high pressure will render you free stock for your next meal. Pour into a quart mason jar or empty mayo container and store in refrige or freeze for future use. No pressure cooker, use a crock pot or boil them discards on the stove, but DON’T throw them away until they have fully served their purpose! Last resort, throw the bones in a Ziploc bag and freeze until you can make stock at a later date. (Hint: add 2 teaspoons white vinegar to your stock before it cooks; vinegar will pull the calcium from the bones and enrich your stock, and you will never taste the vinegar in the finished product!)
Tip 2: I also have issues with smells — especially rotten smells. In the hot summer months, I put food scraps in a plastic bag and throw them in the freezer until trash day. I am talking a plastic grocery sack (sometimes doubled if I have lots of scraps) that I throw peelings; apple cores; meat fat, skin and scraps; boiled chicken bones; forgotten leftovers that are suspect; fish skin; and yes, meat juices! It goes in the freezer, and I add to the bag throughout the week. On trash day, I take the bag of frozen ick and throw it in the trash. No stinky trash dumpster for us, and no pesky animals knocking over a trash can looking for a rancid meal!
Tip 3: I don’t eat organ meat, but whether boiled as part of my stock and removed or cooked separately when making a chicken dinner, the liver and kidneys always go to the fur baby! Feed those tasty morsels to your fur baby, and he/she will love you forever!
Teresa
June 24, 2020 at 9:55 am
Hi, Wendi, You are absolutely right! Bone broth is so medicinal. Unfortunately, most people won’t take the time to do this, but you’re right. Thanks so much for sharing these tips with my readers.
Jay
May 24, 2020 at 9:22 am
This is a great demonstration of how one should write a How-To article. The images help a lot.
Thank you Teresa
Teresa
May 24, 2020 at 10:50 am
Hi, Jay. I know a lot of people have not learned how to de-bone a chicken so that’s why I posted it. I was lucky enough to have an old-fashioned mom who did everything from scratch.
Anonymous
April 16, 2017 at 8:52 am
tip: Get a pressure cooker and do it in 20-30 minutes instead of all day. Crock pots are for making stews.
Teresa
April 16, 2017 at 12:26 pm
Hi, thanks for stopping by. Yeah, I’m not big on using pressure cookers. Got rid of mine years ago. I like cooking chickens in the crockpot overnight. That works for me.
The Best Boning Knife the Market Has to Offer
May 7, 2015 at 11:38 am
[…] can also read this post that has a ton of chicken deboning […]
Tips for Preparing Butternut Squash – Can't Stay Out Of The Kitchen
January 24, 2015 at 9:11 am
[…] Tips for Deboning Chicken […]
Tips for Baking Homemade Bread – Can't Stay Out Of The Kitchen
January 23, 2015 at 6:55 pm
[…] Tips for Deboning Chicken […]
Slow Cooker Gluten Free Chicken Noodle Soup – Can't Stay Out Of The Kitchen
November 23, 2014 at 5:28 pm
[…] chicken from crockpot and debone. For Tips for Deboning Chicken see my post. I added the veggies back into the soup, but removed all bones, fat, gristle, tendons, […]
Stephanie
May 14, 2014 at 8:54 am
This is a really great demonstration of how to debone a chicken! The pictures are helpful 🙂 But don’t throw away your scraps, you can use them to make an extremely healthful and delicious bone broth, and effectively triple your broth output! Just throw it all back in the crock pot and fill with water, add 1-2 tbsp of vinegar to help break down the calcium in the bones, and cook it for about 12 hours! You can add veggies if you want, but it’s just fine without. I don’t have to buy any chicken broth anymore, I make all of my own and it saves us a ton of money, especially since we only buy organic. Give it a try!
Teresa
May 15, 2014 at 4:40 am
What great ideas, Stephanie. Thanks so much for sharing them. I’ll have to give it a try.
Terry
April 5, 2014 at 2:07 pm
I would like to add one thing for your followers, I keep a box of surgical gloves in my kitchen. I use these for everything, deboning chicken, mixing meatloaf, chopping peppers. It keeps the hand washing down to a minimum and some people can’t stand the thought of touching cooked or raw meat.
Teresa
April 5, 2014 at 4:46 pm
Excellent suggestions. Thanks Terry.
Brent
December 15, 2013 at 8:00 am
I’ve never de-boned a cooked chicken before. I cooked my chicken in my slow cooker and now wondering how to get the meat off. I was going to put it in the fridge over night, but after reading your instructions, I’m better informed how to go about doing it. These tips and pictures are exactly what I needed. Thanks a heap!
Teresa
December 15, 2013 at 6:43 pm
I’m so glad you found this helpful. I’ve found when I am too busy or lazy to debone while the chicken is hot that it is a lot harder to do it after refrigeration. The gristle and fat don’t come off the bone as easily and it’s harder to see it and find it versus when the chicken is still hot. I make chicken like this all the time and then use in casseroles using cooked chicken.
Ryan
August 14, 2015 at 2:26 pm
I haven’t done that either. I find it’s easier to de-bone i while it’s still raw 🙂
Teresa
August 14, 2015 at 8:14 pm
I’ve never tried that.
Chicken Pot Pie – Can't Stay Out Of The Kitchen
November 24, 2013 at 8:47 pm
[…] plus I cooked off a chicken in my crockpot for this recipe, which meant doing that overnight and deboning the next morning. This recipe is best made when you have plenty of time. If you need tips for […]
Chicken Spaghetti – Can't Stay Out Of The Kitchen
November 9, 2013 at 6:16 pm
[…] and give a pan to someone else–or place one in the freezer for later. If you need pointers on deboning a chicken check out my post here. You can heat Chicken Spaghetti in the crockpot or bake it in the oven once […]
flyfishbrat
September 21, 2012 at 10:09 pm
I love your post. I’m sending it to some young cooks I know who are always asking me to post something just like this. Your post will help them so much.
Teresa
September 21, 2012 at 10:14 pm
I hoped it would help. I know I shied away from doing this for years, but after I did this and turkey carcasses once or twice it is a lot easier after that.