
Red Velvet Earthquake Cake
Have I got a spectacular dessert for you–Red Velvet Earthquake Cake. Let that sink in. This luscious cake has coconut, pecans and chocolate chips on the bottom layer, then those ingredients are topped with a lovely Red Velvet Cake batter followed by a scrumptious cheesecake layer. This dessert is wonderful, and if you like gooey desserts (which I do), then you will find Red Velvet Earthquake Cake a dessert you will savor down to the last bite!
Follow Me On Instagram!
What’s not to love about red velvet and chocolate chips, red velvet and cheesecake, red velvet and coconut, red velvet and pecans? It all works so well together in this recipe. This amazing cake is a take-off on my Earthquake Cake. If that cake can be considered getting into the play-offs, Red Velvet Earthquake Cake is like winning the Super Bowl! It’s that fantastic.
Red Velvet Earthquake Cake undergoes a seismic shift while baking so that everything becomes somewhat topsy-turvy. It develops cracks on the top of the cake which resemble an “earthquake,” and that’s how the cake got its name. Serve Red Velvet Earthquake Cake with chocolate sauce, ice cream, or whipped topping if desired, but I assure you, this dessert is rich and decadent enough just as it is!
I baked up Red Velvet Earthquake Cake for some friends in our Sunday school class in August when she fell (with a grandbaby in her arms, no less!) and hurt her back (the baby was fine). I took a couple of meals to her which included this marvelous cake. She had her kids and some friends over and they all raved over this dessert. I’m not exaggerating when I say it’s one of the best desserts I’ve made this year. Yum.
If you’re looking for a fabulous holiday dessert then Red Velvet Earthquake Cake has to be on the menu! It’s a great dessert for special occasions like Valentine’s Day, birthdays and anniversaries, too. Plus, it’s really not very difficult since it starts with a Red Velvet cake mix. Everyone in your family will love this gooey dessert so I suggest buying a couple of boxes of Red Velvet cake mix while you’re at it so that you can make more than one of these terrific cakes.
Red Velvet Earthquake Cake has been featured on Recipe Lion. Check out their posts, here and here.
SPECIAL TIPS:
Red Velvet Earthquake Cake bakes differently in every oven. I’ve had people say their cakes were overdone at 45 minutes, and others tell me that their cake took as long as mine to bake – almost an hour and a half.
If you want to bake this cake successfully and you don’t want it to scorch on the bottom or the cream cheese to brown too much on top, then follow these tips:
1) Cover with foil after 30 to 40 minutes of cooking time especially if you have a hot oven. This will prevent the cream cheese from browning too much.
2) Start checking your cooking time every ten minutes after the cake has baked 30 minutes. Some ovens may bake this cake in less than 45 minutes, but most ovens will take longer. Test with a toothpick. When a toothpick comes out clean then the cake is done.
3) I used a glass baking dish to bake my cake in. Aluminum pans may cook more quickly. Please adjust your time accordingly.
DON’T BAKE THIS CAKE STRICTLY BY TIME!
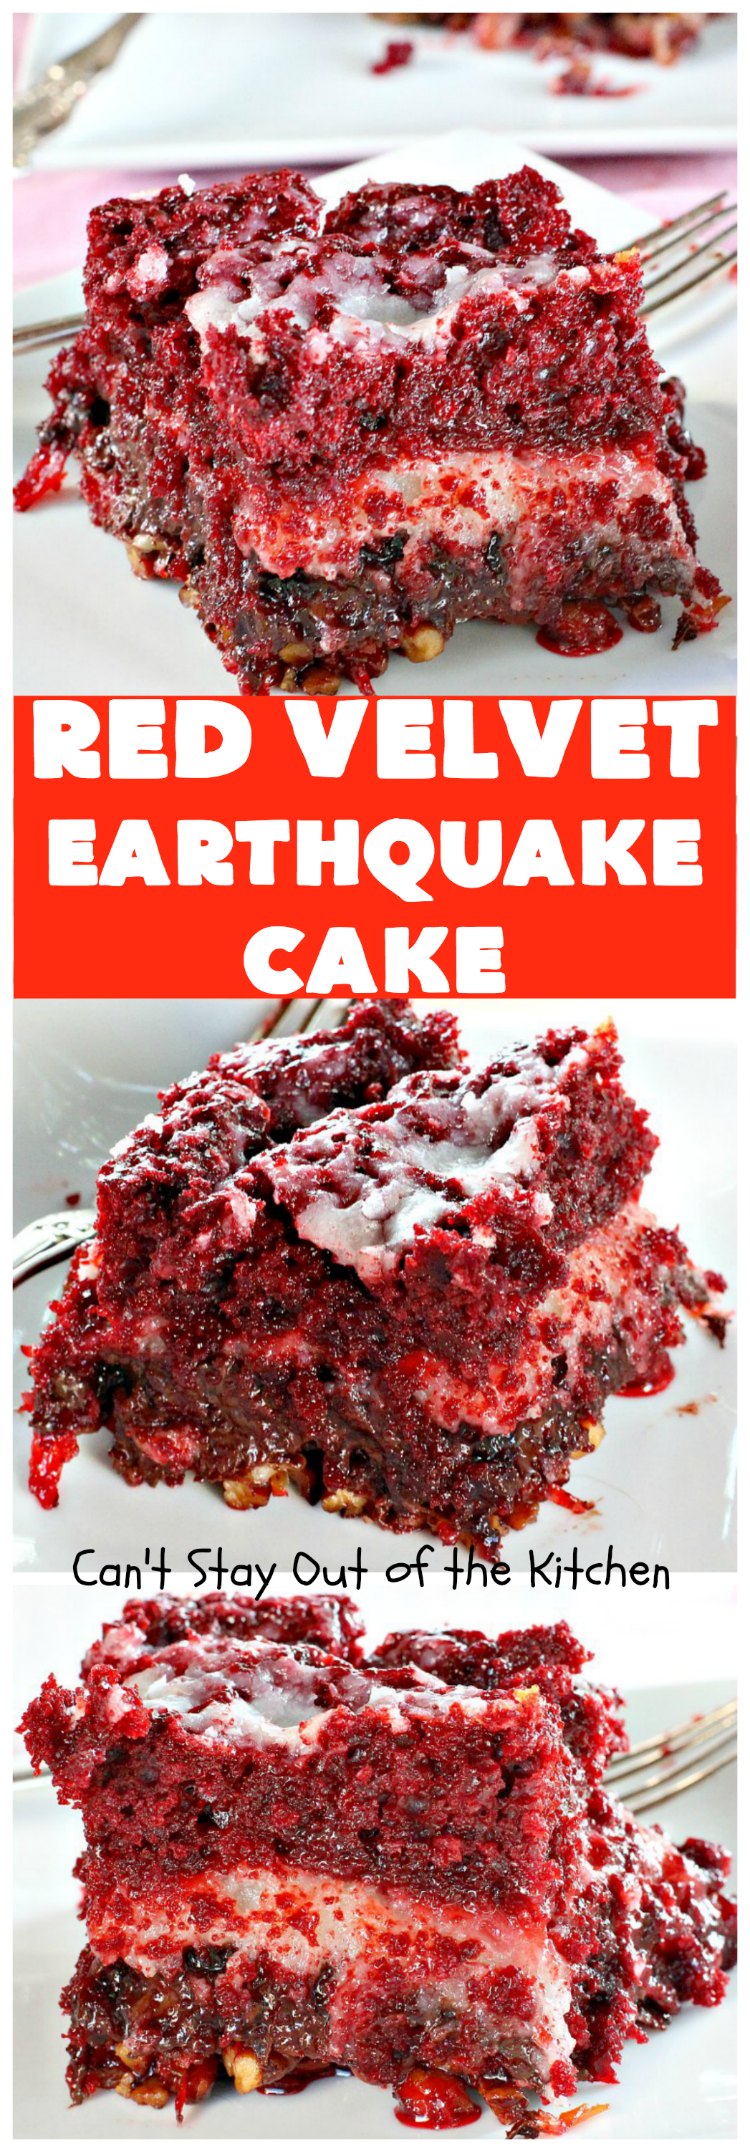
Red Velvet Earthquake Cake is phenomenal!
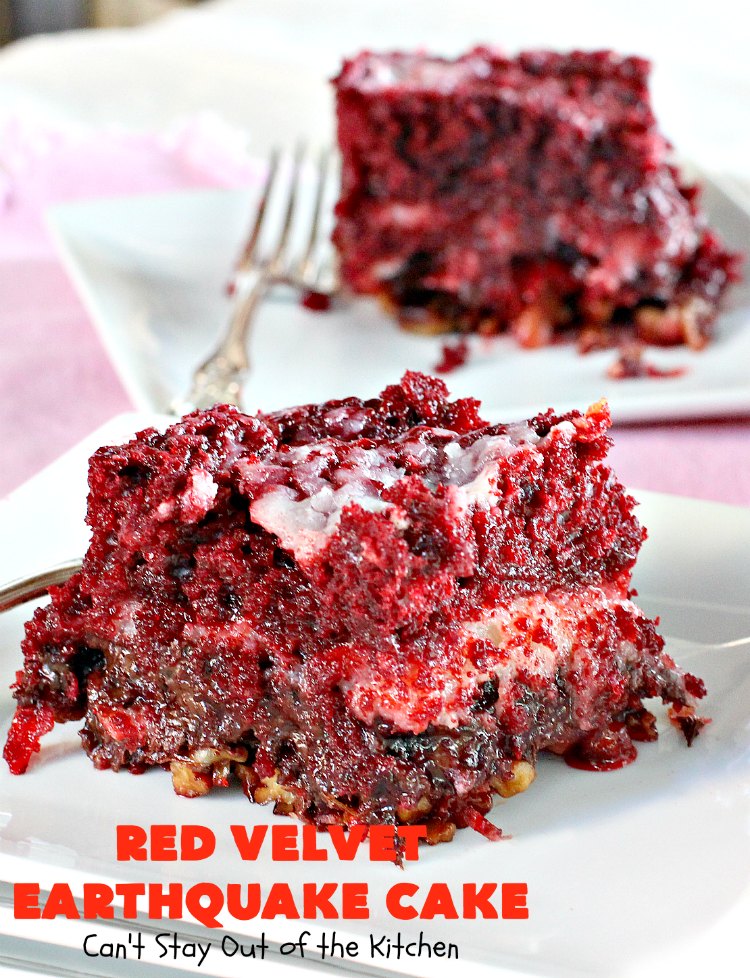
This luscious cake is made with a Red Velvet cake batter, a cream cheese layer, and a layer of coconut, pecans and chocolate chips. Then it undergoes a shift while baking.
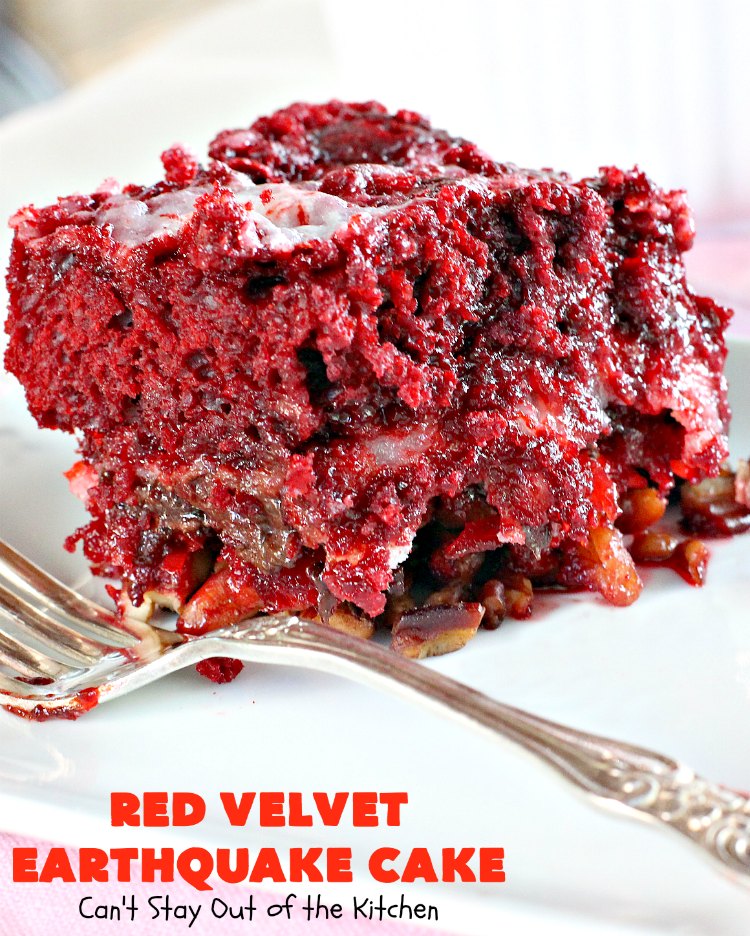
Everyone will want seconds and thirds of Red Velvet Earthquake Cake.
Here’s what I did.
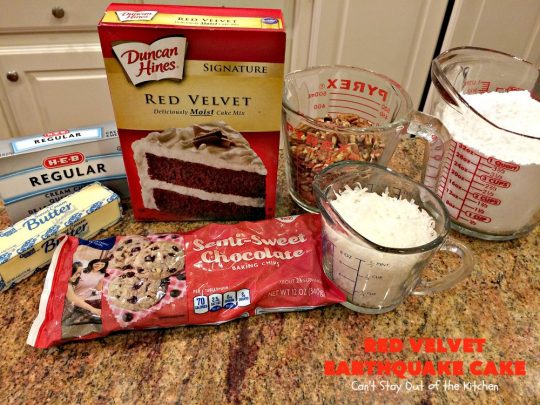
I used these ingredients to make Red Velvet Earthquake Cake.
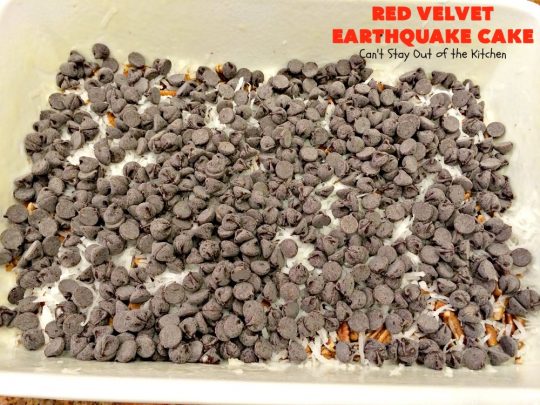
Grease and flour a 9×13″ baking dish really well so ingredients don’t stick to the dish. Spread pecans on the bottom. Top with coconut and then chocolate chips.
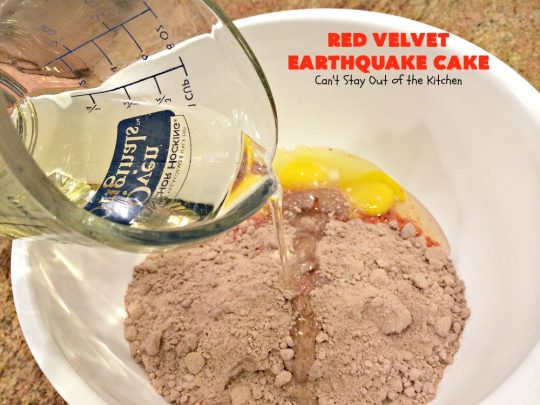
Follow the directions on the back of the Red Velvet Cake mix adding ingredients required to make the cake: eggs, oil and water.
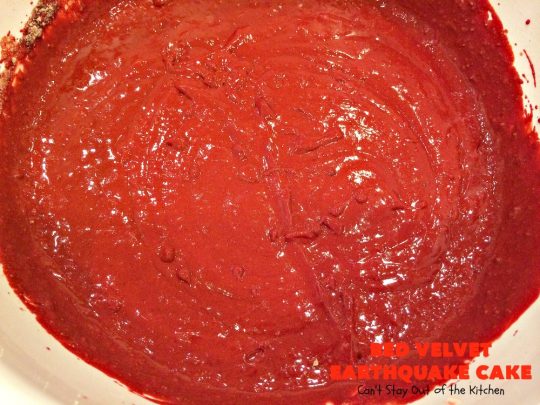
Whisk ingredients until smooth.
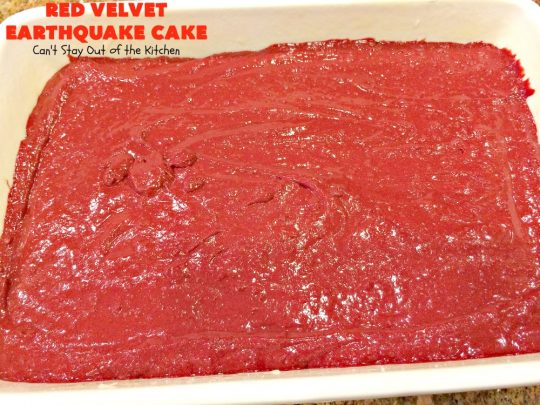
Spread Red Velvet cake batter over top of chocolate chips in baking dish.
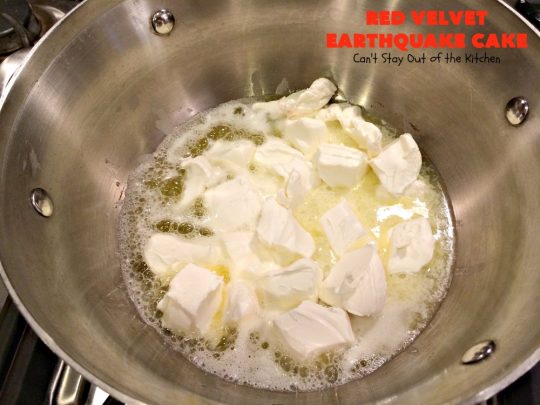
To make cheesecake layer: place butter and cubed cream cheese in a small saucepan over low to medium heat.
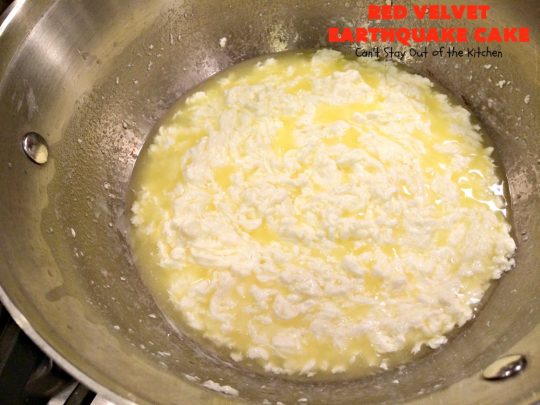
Whisk continuously until cheese melts. Remove from heat.
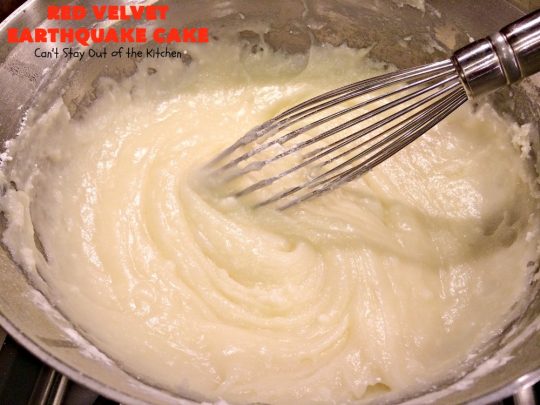
Add powdered sugar and whisk until smooth.
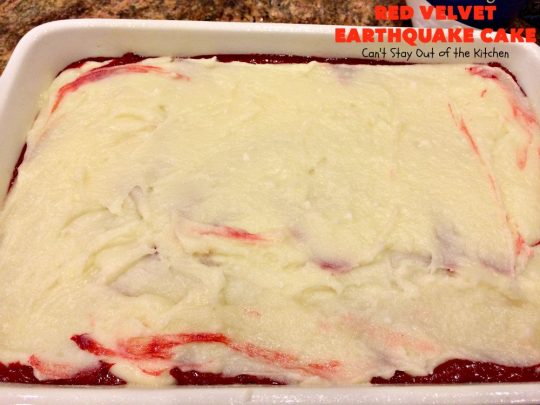
Spread cheesecake layer over top of cake batter and smooth the top.
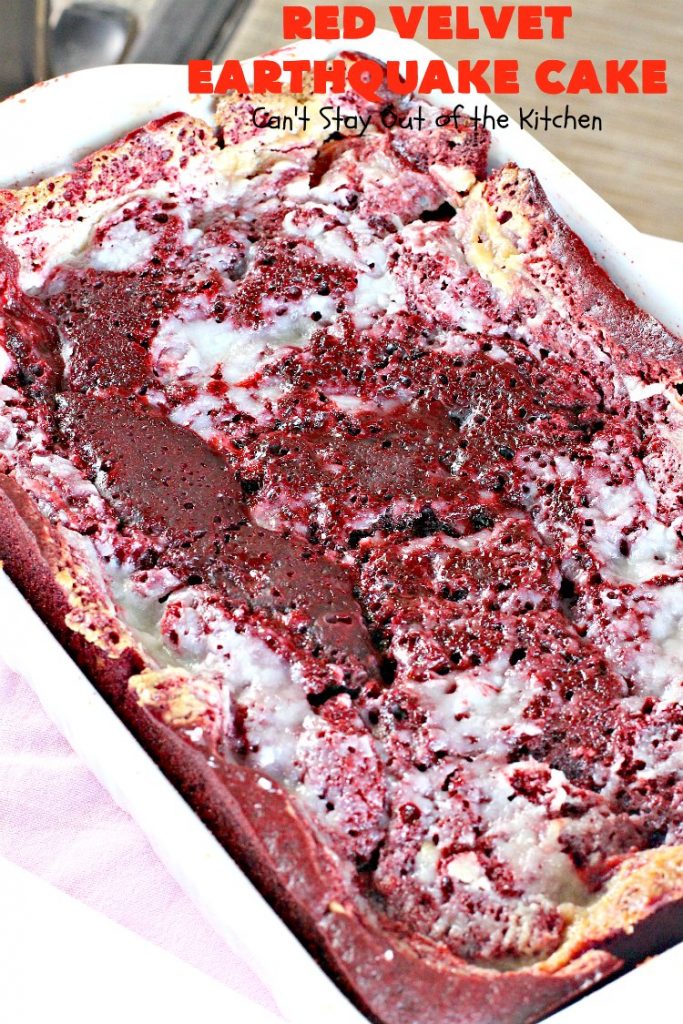
Bake 30 minutes at 350. Tent with foil. Bake an additional 30-45 minutes or until cake tests done. My oven usually takes about 1 hour 15 minutes to completely bake an Earthquake Cake of any variety.
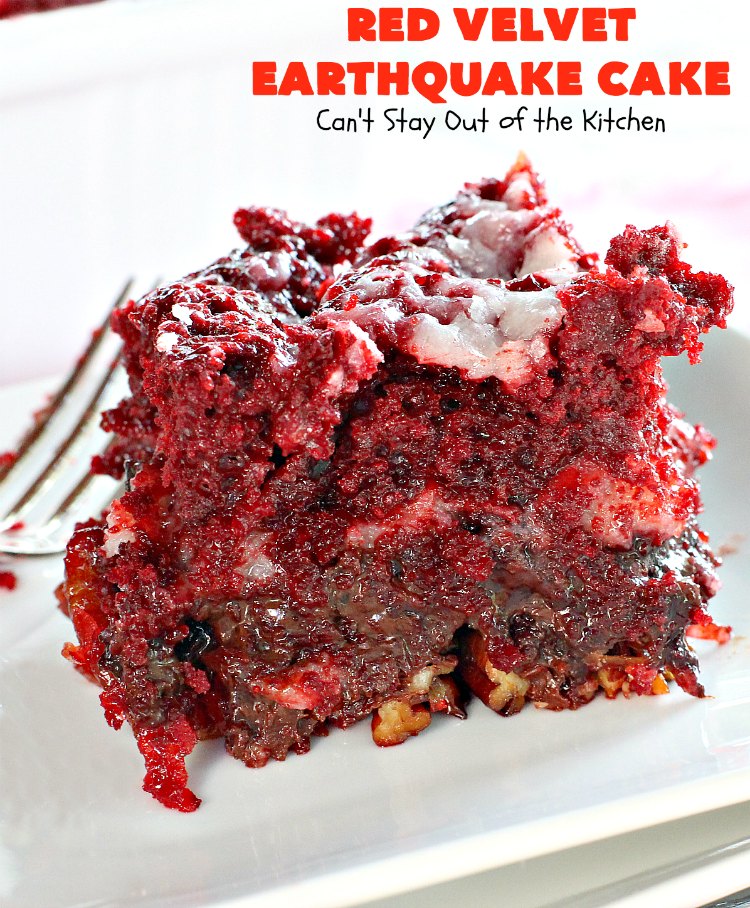
You’re sure to get rave reviews when you make Red Velvet Earthquake Cake.
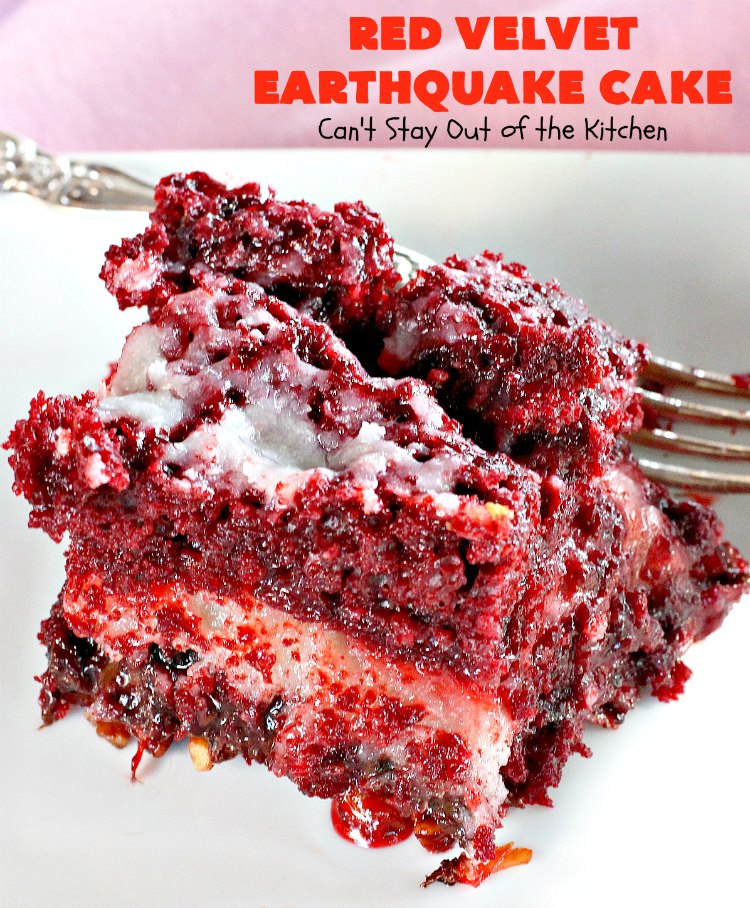
You can see the craters in this cake. The cheesecake layer has sunk into the cake and the red velvet layer has drifted to the top.
Here’s the recipe.
RED VELVET EARTHQUAKE CAKE
(Recipe inspired by Hannah Noice’s Earthquake Cake, Ovilla Road Baptist Church, Ovilla, TX)
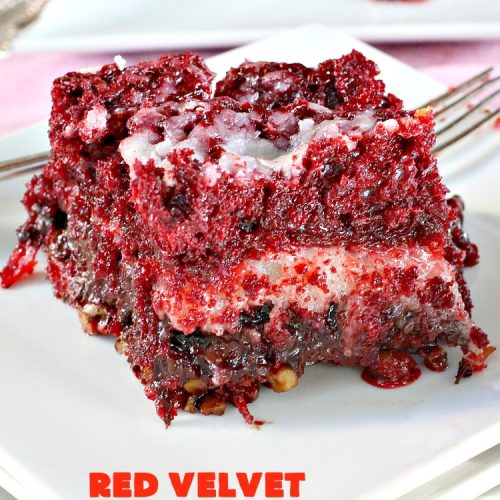
Red Velvet Earthquake Cake
Equipment
- 1 9x13" glass baking dish
- 1 large mixing bowl
- 1 electric mixer
- 1 wooden spoon
- 1 nut chopper if nuts are not previously chopped
- measuring cups
- measuring spoons
- 1 small sauce pan
- 1 whisk
Ingredients
- 1 Red Velvet cake mix
- 1 cup coconut
- 1 1/2 cups pecans chopped (measure after chopping)
- 12 oz. pkg. chocolate chips
- 8 oz. cream cheese
- 1/2 cup unsalted butter (1 stick)
- 4 cups powdered sugar
Instructions
- Preheat oven to 350°.
- Grease and flour a 9x13” baking dish.
- Spread pecans, coconut and then chocolate chips in the bottom of the prepared dish.
- Mix cake mix according to package directions.
- Spread over top of chocolate chips.
- Melt butter and cream cheese over low to medium heat in small saucepan.
- Remove from heat.
- Add powdered sugar and whisk to combine.
- Spread powdered sugar mixture over top of cake batter in baking dish.
- Smooth the top.
- Bake for 30 minutes and tent with foil.
- Bake an additional 30 - 45 minutes or until cake tests done.
- Cool completely before cutting into squares.
- Store covered tightly.
- After 2 days, store in refrigerator.
Notes
© Can’t Stay Out of the Kitchen
Nutrition
- 1 [url href=”http://www.duncanhines.com/” target=”_blank” title=”duncan hines”]Duncan Hines[/url] Red Velvet Cake Mix
- 1 cup coconut
- 1 ½ cups chopped pecans
- 12-oz. pkg. chocolate chips
- 8-oz. cream cheese
- 1 stick (1/2 cup) butter
- 4 cups powdered sugar
- Preheat oven to 350°.
- Grease and flour a 9×13” baking dish.
- Spread pecans, coconut and then chocolate chips in the bottom of the prepared dish.
- Mix cake mix according to package directions.
- Spread over top of chocolate chips.
- Melt butter and cream cheese over low to medium heat in small saucepan.
- Remove from heat.
- Add powdered sugar and whisk to combine.
- Spread powdered sugar mixture over top of cake batter in baking dish.
- Smooth the top.
- Bake for 30 minutes and [u]tent with foil[/u].
- Bake an additional 30 -45 minutes or until cake tests done.
- Cool completely before cutting into squares.
- Store covered tightly.
- After 2 days, store in refrigerator.
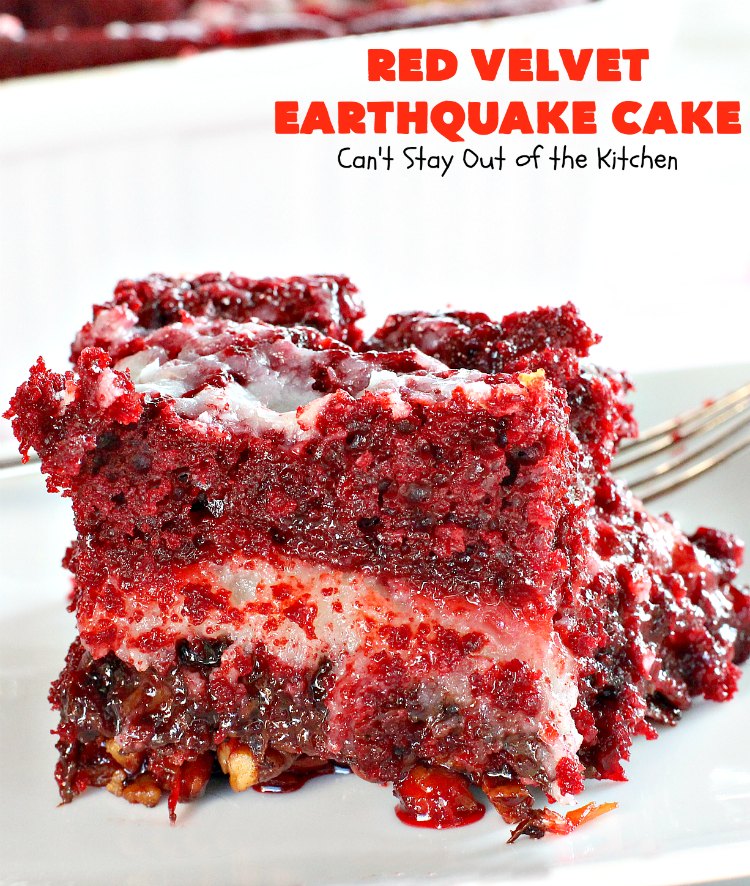
Red Velvet Earthquake Cake is a wonderful cake to make for Christmas and Valentine’s Day parties. It’s also a great cake to make for birthdays, anniversaries and other special occasions.

Red Velvet Earthquake Cake is filled with coconut, pecans and chocolate chips along with a cheesecake layer that makes it one of the most scrumptious and decadent desserts you’ll ever eat.
You may also enjoy these delicious recipes!




Red Velvet Earthquake Cake
Equipment
- 1 9×13" glass baking dish
- 1 large mixing bowl
- 1 electric mixer
- 1 wooden spoon
- 1 nut chopper if nuts are not previously chopped
- measuring cups
- measuring spoons
- 1 small sauce pan
- 1 whisk
Ingredients
- 1 Red Velvet cake mix
- 1 cup coconut
- 1 1/2 cups pecans chopped (measure after chopping)
- 12 oz. pkg. chocolate chips
- 8 oz. cream cheese
- 1/2 cup unsalted butter (1 stick)
- 4 cups powdered sugar
Instructions
- Preheat oven to 350°.
- Grease and flour a 9×13” baking dish.
- Spread pecans, coconut and then chocolate chips in the bottom of the prepared dish.
- Mix cake mix according to package directions.
- Spread over top of chocolate chips.
- Melt butter and cream cheese over low to medium heat in small saucepan.
- Remove from heat.
- Add powdered sugar and whisk to combine.
- Spread powdered sugar mixture over top of cake batter in baking dish.
- Smooth the top.
- Bake for 30 minutes and tent with foil.
- Bake an additional 30 – 45 minutes or until cake tests done.
- Cool completely before cutting into squares.
- Store covered tightly.
- After 2 days, store in refrigerator.

73 Comments
50 Red Velvet Recipes for Every Occasion – Restless Chipotle
March 8, 2024 at 12:47 pm
[…] Red Velvet Earthquake Cake […]
Glenn
April 19, 2023 at 3:20 am
Can’t wait to share this with my mom for her new recipe collection. Thanks!
Teresa Ambra
April 19, 2023 at 5:18 pm
Great!
Enjoy purple velvet desserts? Test these wonderful recipes now – Food Coloring
April 3, 2023 at 5:27 am
[…] a person will guess that these healthier purple velvet vegan cupcakes are a better-for-you dessert! Chocolate-Covered Katie does it yet again — this time, by subbing […]
Kırmızı kadife tatlılarını sever misiniz? Bu harika tarifleri şimdi deneyin – wesaal
February 21, 2023 at 8:28 pm
[…] kimse tahmin edemez kırmızı kadife sağlıklı vegan kekler senin için daha iyi bir tatlı! Çikolata Kaplı Katie bunu tekrar yapıyor – bu sefer ayran […]
Love crimson velvet desserts? Strive these superb recipes now – HEADLINESHUNT
February 21, 2023 at 1:26 pm
[…] will guess that these wholesome crimson velvet vegan cupcakes are a better-for-you dessert! Chocolate-Lined Katie does it once more — this time, by subbing in […]
Love red velvet desserts? Try these amazing recipes now – Pehal News
February 21, 2023 at 12:59 pm
[…] will guess that these healthy red velvet vegan cupcakes are a better-for-you dessert! Chocolate-Coated Katie does it once more — this time, by subbing in […]
15 Insanely Simple Dump Cakes You Can Make in Minutes – OnNewsLive
January 25, 2022 at 8:22 pm
[…] Can’t Stay Out of the Kitchen […]
Bettye Sue Kavanaugh
November 18, 2021 at 5:21 am
Making this cake tomorrow…. quick question, do I have to use chocolate chips or can I use semi-sweet chocolate chips? I know chocolate chips keep their shape under high heat & semi sweet melt. Thanks bunches!
Teresa
November 18, 2021 at 2:59 pm
Hi Bettye Sue, I think I have used both kinds when I’ve made this cake. I don’t think it made any difference.
Easy and Delicious Red Velvet Earthquake Cake Recipe – Tasty Recipedia
November 24, 2020 at 5:17 pm
[…] Remove from heat. READ MORE […]
Red Velvet Earthquake Cake – Tasty Recipedia
November 10, 2020 at 5:03 am
[…] Original Recipe : http://cantstayoutofthekitchen.com/2014/10/05/red-velvet-earthquake-cake/ […]
Robin Suttin
January 2, 2021 at 8:47 pm
I made it !! The fist time. I messed it up! But the next few days i tried it again and it was a great success. Thank you for sharing .if i knew how to send you a copy of mine i would . i was happy. It came out perfect. The cake was cook completely. Not overdone i had a lava effect to the bottom to infuse into the cake . and the top has the creamy frosting showing at the top. Now im ready to try the carrot earthquake cake. Thank you for sharing . im not really a baker but i try.
Teresa
January 4, 2021 at 5:14 am
Hi Robin. So glad the recipe turned out well for you. Each oven is different so baking times have to be adjusted. But this is wonderful when made correctly.
Lynn
April 11, 2020 at 4:31 pm
Just tried this recipe and got a gooey mess. Cream cheese/powdered sugar mixture was so heavy that it did not easily spread on top of cake batter and started to fall into the batter instead. Baked anyway for the amount of time suggested and starting checking after 30 minutes. Baked a total of 1 hour and 15 minutes until toothpick came out clean. Once cooled, cut into cake and got a gooey red mess inside with the edges dry and burnt. Wouldn’t try this again as it was a waste of ingredients 🙁
Teresa
April 13, 2020 at 6:32 am
Hi, Lynn. This is one of those high maintenance cakes. As I stated in my directions you may have to tent the cake to prevent the edges from burning. It sounds like your cake needed to bake another 15 minutes or so. Also you may have needed a larger baking pan.
Tina
February 9, 2022 at 10:49 pm
Hi, do you have to use that much sugar? Seems like a lot!!
Teresa
February 10, 2022 at 7:06 am
Hi, Tina. Yes, it does seem like a lot, but it turns out wonderfully.
The 11 Best Earthquake Cake Recipes – Lovely Does It
July 8, 2019 at 3:42 pm
[…] CLICK TO COOK IT […]
MB
May 1, 2019 at 12:56 pm
This looks amazing! I might make it this weekend for a bake sale.
After reading the reviews you might try Wilton’s cake pan strips for even cooking. If you don’t have any take aluminum foil and place 1-2 wet paper towels inside and fold them up. Then place them around the sides of the pan while they are cooking. I found this tip when I started to make sheet cakes. They do help.
Teresa
May 1, 2019 at 4:14 pm
Thanks so much for the tips. Hope you enjoy the cake.
Réd Vélvét Éarthquaké Caké – Zhafira Best Recipe
April 4, 2019 at 4:49 am
[…] For Full Instructions http://cantstayoutofthekitchen.com/2014/10/05/red-velvet-earthquake-cake/ […]
44 SCRUMPTIOUS RED VELVET RECIPES – The Lifestyle Hacks | Food Recipes, Fitness, & DIY
December 6, 2018 at 8:38 pm
[…] From: CantStayOutOfTheKitchen […]
JEFF FERRIS
December 18, 2017 at 6:11 am
This sounds amazing! But, I have people that don’t like coconut and people that don’t like pecans. I really want to make this, but can you suggest a variation so that I can still make this?
Thanks.
Teresa
December 18, 2017 at 7:31 am
Hi, Jeff. Regarding the nuts, I think you can find another nut that might work well too. Perhaps macadamia nuts or almonds might be worth a try. I’m not sure what to say about the coconut except perhaps tell them to only eat the top part of the cake?? Sorry.
JEFF FERRIS
December 18, 2017 at 8:05 pm
I guess what I should have asked is, can I make it without them? (coconut/pecans)
Teresa
December 19, 2017 at 9:27 am
Yes, Jeff, you can make them without them. The cake won’t have the full flavor, but it’s still really good.
Anonymous
October 8, 2016 at 10:35 am
Have you tried making this in a crock pot?
Teresa
October 8, 2016 at 7:11 pm
I have never tried making this in the crock pot.
Danielle
August 26, 2016 at 4:04 pm
OMG. I think I need to go to confession. I made this cake on Monday. It’s sinfully good. Easy to make. I baked it for a total of 40 minutes. 20 at 350F, tented with foil and reduced the oven to 325F for another 20 minutes while checking every 10 minutes. Everyone loved it. It’s a keeper.
Teresa
August 27, 2016 at 3:53 pm
So glad you and your family thought this dessert was terrific, Danielle. Thanks for your baking tips, too. They will help others who decide to give this recipe a try. And yes, this cake is sinfully good. 🙂
Cheryl
August 24, 2016 at 1:23 pm
Can anybody tell me whether this cake can be cut into slices, or is more like a dump cake?
I am a little skeptical about making it, with all of the negative reviews. Ingredients are expensive, and if it does not come out, I would be a very unhappy person. I had a party for my husband, and took a recipe off the internet blog sites for million dollar bars, and when I went to cut them, before the party, it was like soup. Luckily I had more sweets to serve. You just never know.
Teresa
August 24, 2016 at 2:21 pm
Cheryl, while this can be a high maintenance cake it is worth it if you’re willing to give it a try. After baking 30-45 minutes (depending on your oven) you may have to tent the cake with foil so it doesn’t over brown on the top. If you cook it long enough it won’t be soupy. On the other hand, it doesn’t need to be overcooked either. Depending on your oven it make take 45 minutes, an hour, or even an hour and 15 minutes to bake completely. The result is an explosion of flavor to die for.
Anonymous
August 24, 2016 at 1:11 pm
Has anybody made this cake yet? It looks really gooey. My question is, can you cut them into squares? Or is it more like a dump cake where you just spoon it out. We have a Labor Day party and I want to make it, but I do not want to bring the rest home. If I can cut them into squares, I can just bring them on a plate and leave the rest for our friends to enjoy.
Cheryl
August 24, 2016 at 1:10 pm
Has anybody made this cake yet? It looks really gooey. My question is, can you cut them into squares? Or is it more like a dump cake where you just spoon it out. We have a Labor Day party and I want to make it, but I do not want to bring the rest home. If I can cut them into squares, I can just bring them on a plate and leave the rest for our friends to enjoy.
Teresa
August 24, 2016 at 1:21 pm
Hi, Cheryl, the cake can be cut into pieces. While it is somewhat gooey, it’s not like a dump cake or a cobbler. Hope you enjoy it at your party.
Red Velvet Cookie Dough Cheesecake Brownies – Can't Stay Out of the Kitchen
February 25, 2016 at 5:11 pm
[…] Red Velvet Earthquake Cake […]
50 Best Red Velvet Recipes on the Internet | Restless Chipotle
February 10, 2016 at 1:22 pm
[…] Red Velvet Earthquake Cake […]
Deb Wilson
February 8, 2016 at 1:12 pm
I am not a fan of powered sugar…too sweet . Was wondering if I could reduce the amount (4C) that is combined with the cream cheese..like down to 1/2 cup or even less….
Thanks
Teresa
February 8, 2016 at 6:07 pm
Hi Deb. I think this would totally change the consistency of the cake and it would not be sweet enough. What about using regular granulated sugar instead of powdered sugar? Cut it down to no lower than 2 cups.
15 Fabulous Red Velvet Desserts for Valentine's Day – Can't Stay Out of the Kitchen
January 21, 2016 at 7:34 pm
[…] Red Velvet Earthquake Cake […]
Trina and Tina
January 21, 2016 at 12:31 pm
We love the chocolate earthquake cake, but making it red velvet style certainly “takes the cake”! Seriously can’t wait to bake it for a Saturday sweet treat soon!
Thanks!
Teresa
January 21, 2016 at 4:47 pm
Hope you enjoy. Just remember each oven is different so cooking time can really vary.
Tiffany
January 15, 2016 at 8:11 pm
I am in the process of baking this cake. It smells great! I am a bit worried though. It’s been an hour and 15 mins and it’s still too loose in the center. I wonder if the oven temp could be adjusted as long as we use foil to protect the cream cheese on top?
Teresa
January 16, 2016 at 10:11 am
Hi, Tiffany. Yes, you could probably adjust the oven temperature. Make sure the cake is in the middle of the oven rather than too close to the bottom or the bottom will burn. You may just have to take the foil off and cook it and the cream cheese will brown a little. If you’re not concerned about the appearance I’d probably do that. Hope it turns out well for you.
Funfetti Earthquake Cake – Can't Stay Out of the Kitchen
March 6, 2015 at 10:03 am
[…] another of my delicious Earthquake Cakes.F-U-N-F-E-T-T-I Earthquake Cake. Oh, my. My first two, Red Velvet Earthquake Cake and plain Earthquake Cake have gone ballistic on Pinterest. If you tasted either of them, […]
Gerri
January 31, 2015 at 8:22 am
Teresa. Why not try reversing ingredients in pan. This might resolve baking problems. Just wondering. Gerri
Teresa
January 31, 2015 at 11:35 am
It might Gerri, although this was the way the recipe was given to me and I’ve not tried it the other way. My thoughts are, I wonder if it would explode like an earthquake if those ingredients are on top? I think they would weigh the ingredients down so I’m not sure if it would work. If you try it that way, I hope you let me know your findings. I’d love to see a picture, too. If you do layer and cook it tented with foil as suggested, and allow it to cook all the way through (which may take over an hour) it turns out pretty terrific. Thanks for stopping by, Gerri, and thanks for your suggestions.
Red Velvet Cake Roll – Can't Stay Out Of The Kitchen
January 25, 2015 at 7:10 pm
[…] Red Velvet Earthquake Cake […]
tara
January 24, 2015 at 12:52 pm
Do have to use cake mix from box
Teresa
January 24, 2015 at 5:15 pm
I did, Tara, but if you have a good chocolate cake recipe from scratch you’d like to substitute, I don’t know why that wouldn’t work. Just be careful on your time. Your recipe may have more or less cake batter than the amount used in a cake mix which will definitely change baking times and the texture of the cake.
Anonymous
January 31, 2015 at 8:18 am
Why not try reversing the ingredients with the coconut nuts and chocolate on the top. This might make it easier to cook? Just wondering. Gerri
Veronica
December 29, 2014 at 10:54 am
I just have to say that i am obsessed with your site and your recipes and I think you are absolutely a genius and fantastic. i have made many of your recipes and they are always fantastic. I just was wondering if you can half this recipe and use a 9×9? I know you would have to half the cake mix, but i wonder if it would work? You probably really need to watch the bake time?
Teresa
December 29, 2014 at 11:14 am
Veronica, you are so sweet and kind. I really appreciate the positive feedback, it’s really a big encouragement to me. I am certainly gratified that you’ve made a lot of my recipes and have enjoyed them. I love to cook and share with others great recipes we have enjoyed so they can enjoy them too.
Regarding the cake, why not try making a half batch? I don’t see why it wouldn’t work. Let me recommend two things. Cover the cake with foil (tent it so it doesn’t actually touch any of the cake batter). I would do it the whole time to avoid over browning of the cream cheese. If you have to, take it off about 5 minutes before it tests done if the top doesn’t cook quite enough. Yes, you will definitely have to cut back the cooking time. I don’t see how this could cook in less than 30 minutes. But if you have a hot oven, start watching it after 20 minutes. Check it every 5-10 minutes until done (when a toothpick inserted in center comes out clean). While this is kind of a high maintenance cake, it is really worth it if you do it right and are willing to work with it a little bit. If you have a really hot oven, you may want to decrease the temperature and bake at 300 or 325. I always bake in glass baking dishes because I like the way they cook better than in aluminum, but aluminum tends to cook baked goods faster than baking dishes, so be warned! Just baby the recipe a little and you will have a cake all your family and friends will drool over! 🙂
Amy
December 24, 2014 at 9:03 pm
Was so excited to make this cake for tomorrow’s Christmas dinner. Just took it out of the oven at 45 minutes and it is waaaaay overdone. 🙁 Cooking times need to be adjusted downward in a big way. I would recommend cooking the cake for the time recommended on the DH Red Velvet Cake mix box (25-28 minutes), then checking for doneness every 5-10 minutes thereafter. As it stands now, I will have to scramble to make something else my family can eat for dessert.
Teresa
December 25, 2014 at 8:55 am
I’m sorry, Amy. This is a high maintenance cake though it is beautiful when it turns out right. Every oven cooks differently. I tented mine with foil and perhaps my oven is slower than yours because it took almost an hour and a half to bake the way it looks in the pictures.
Mari Beth
December 24, 2014 at 11:58 am
The cream cheese topping on mine looks burnt around the edges. I baked it for an hour because it was not done in the middle after 45 min. But it started looking burnt before the 45 min was up. I was watching it thru my oven door. Any suggestions for why that happened. It was on the middle rack of the oven. I would post a pic of what it looks like but I don’t see an option to be able to post one.
Teresa
December 24, 2014 at 5:34 pm
Mari Beth, This cake has to be tented with foil to avoid the cream cheese from getting too brown. I recommended it by 45 minutes but some ovens could probably stand to have the cake tented with foil after 30 minutes if they run hot. I will make another notation in the recipe for everyone to tent with foil. Even though this is somewhat of a high maintenance cake it is so delicious. I hope the next time you make it, it turns out more to your desire.
Pat C
December 24, 2014 at 9:42 am
Good Morning!! I got up early this morning and decided to go ahead and bake this cake. It is out of this world!! I used a glass pan and my oven cooks fast so I baked at 300 degrees, I did the foil after about 45 mins as suggested. Mine took a bit longer to cook and I checked it every 10 – 15 mins just in case. It was a bit high maintenance but I”m oh so glad I took care with it. YUMO (decided to taste a piece before serving to others). It’s sure to become a family favorite, but due to the effort + calories, I’ll only be making this once a year. Thanks for sharing the recipe!! Merry Christmas!!!
Teresa
December 24, 2014 at 5:35 pm
Oh, Pat, I’m so glad you enjoyed it. It truly is one of those cakes that you have to baby along a little bit, but it is so worth it if it’s cooked properly! Enjoy your Christmas dessert!
Susie Stephens
December 24, 2014 at 8:55 am
I have a question. What kind of baking pan should I use. Glass or metal.
Teresa
December 24, 2014 at 8:57 am
Susie, I prefer using baking dishes because everything comes out a little easier. But you can use a pan also. Keep a good eye on your time. My oven took almost an hour and a half, but if your oven runs hot this may be done in 45 minutes or less! Go by testing with a toothpick rather than strictly by time.
Joy Alexander
December 22, 2014 at 5:47 pm
Disappointed I followed the cooking times exactly and it was burned on the bottom. It didn’t stick but taste really scorched. My oven usually cooks slow so I didn’t check it until the 45 and 30 min times required by the receipe . A waste of expensive ingredients and my time
Teresa
December 22, 2014 at 7:49 pm
I’m so sorry, Joy. Mine really took that long. I will put a note to check it earlier. Thanks for letting me know.
Teresa
December 22, 2014 at 7:58 pm
I am so sorry you had a bad experience, Joy. I always use the time measurement as a guide and cook as long (or short) as necessary. I know you must be terribly disappointed and I hate wasting ingredients, too. This cake is so good, I hope you give it another try. Start checking after 30 minutes and every 15 minutes after that until the cake is baked the way you like it.
Caren
December 17, 2014 at 5:55 pm
Yummy!
Teresa
December 17, 2014 at 7:58 pm
🙂
Caren
December 17, 2014 at 5:54 pm
This cake sounds awesome! I have some in my family that don’t like coconut. Could I leave it out. I have never had a red velvet cake with coconut anyway.
Teresa
December 17, 2014 at 7:58 pm
Caren, this is an earthquake cake with a red velvet flair. It is absolutely fabulous with the coconut, but if you have family that won’t eat it, then I would leave it out. It really is an awesome cake, I’m sure you’ll enjoy it. Just make sure you cook it long enough. Mine took over an hour to cook through, so I had to tent it with foil half way through so it didn’t get too brown on top but not cooked through enough inside.
Joy Alexander
December 22, 2014 at 5:55 pm
Your receipe calls for 1 hour and 15 minutes . Did you cook it that long? Mine was burned on the bottom
Willie Hutto
November 12, 2014 at 3:48 pm
Do you tent when the cake first goes into the oven? Or before the second baking ?
Teresa
November 12, 2014 at 4:43 pm
Willie, I baked the cake for 45 minutes without being covered. Then I draped foil over top (but didn’t tighten it down), until the cake was completely cooked so that the cream cheese wouldn’t get too brown while baking. As I recall, this cake took a LONG time to bake because it was so gooey. I hope you and your family enjoy it. We sure did.
Earthquake Cake – Can't Stay Out Of The Kitchen
November 3, 2014 at 9:42 pm
[…] This lovely cake was featured on Recipe Lion, on this post. You may also enjoy my Red Velvet Earthquake Cake! […]